Mini Piñata Tutorial

Ever thought about making a mini piñata? It can be made out of old cereal or snack boxes and can be filled with fun treasures! We should all be having mini piñata parties at home, I think.

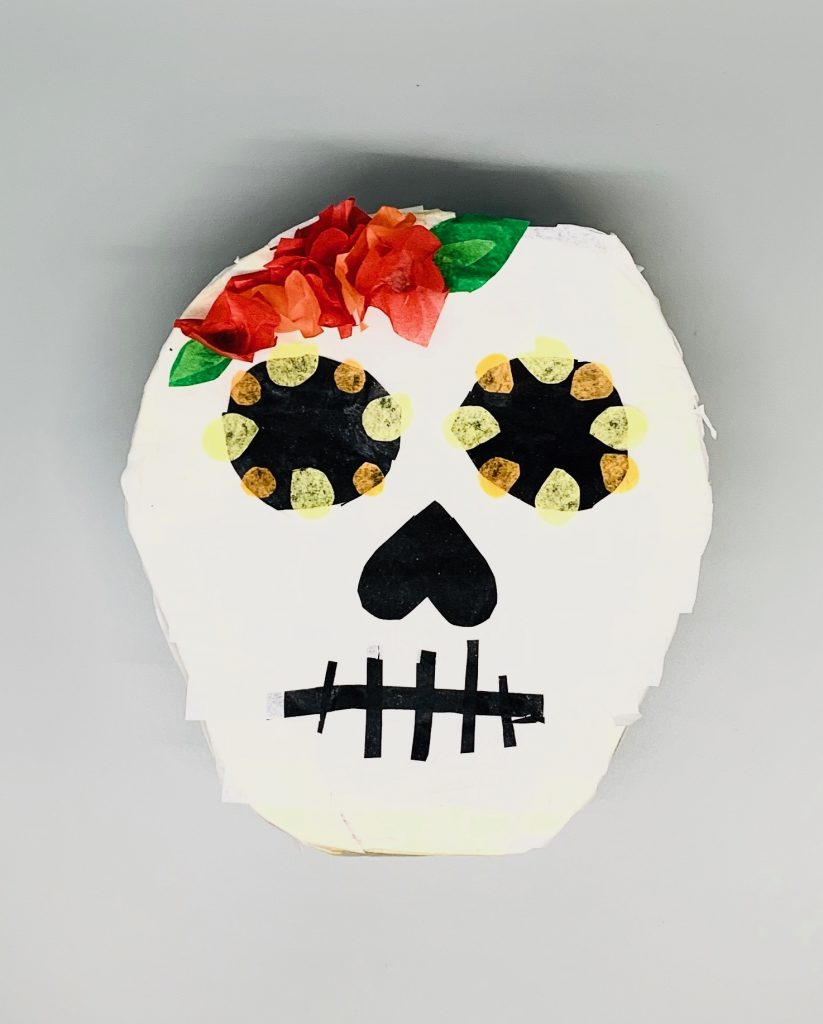
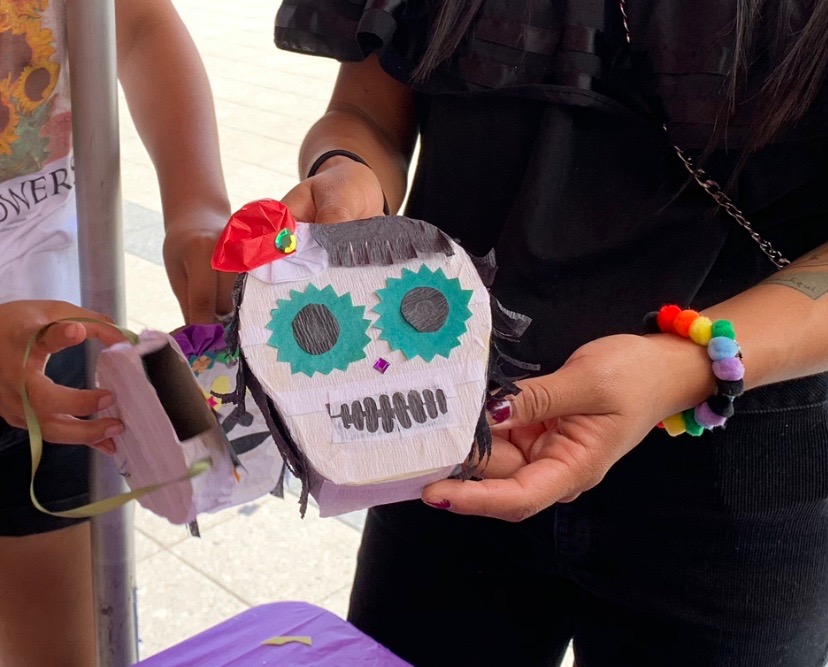
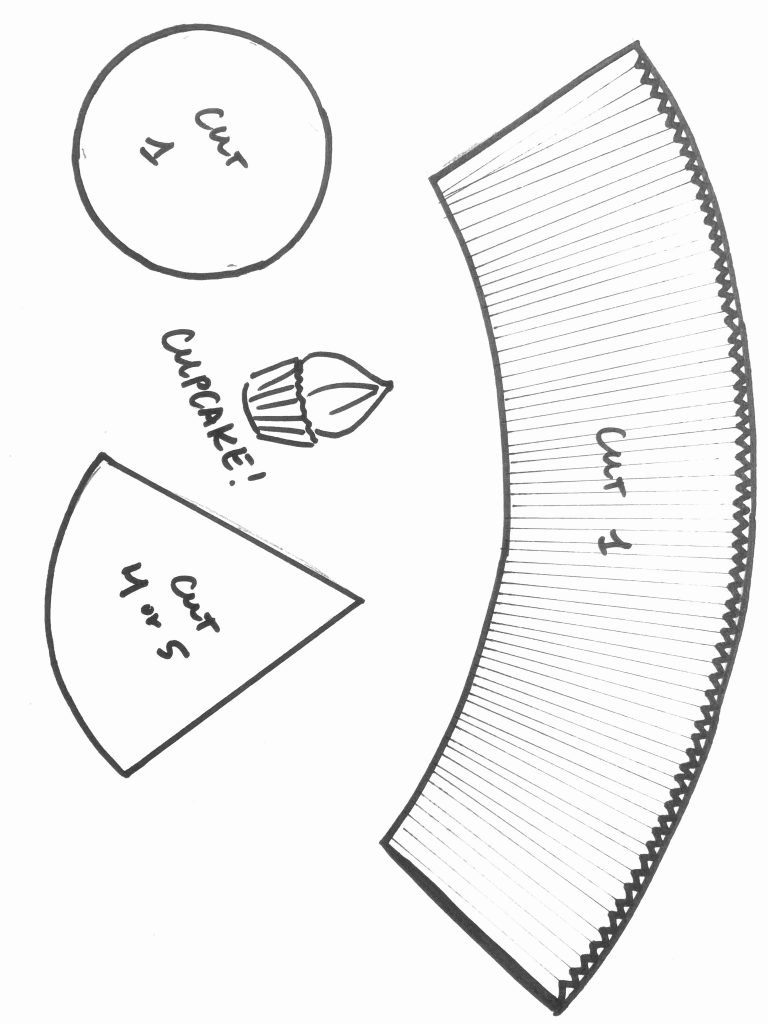
This awesome ‘how-to’ video by our teacher Maria Cruz shows you step-by-step instruction on how to make a sugar skull piñata. But of course, your piñata can be anything you’d like it to be! Unicorns, pandas, mermaids, sloths? Just follow along and you’ll have an amazing piñata in no time!

Materials:

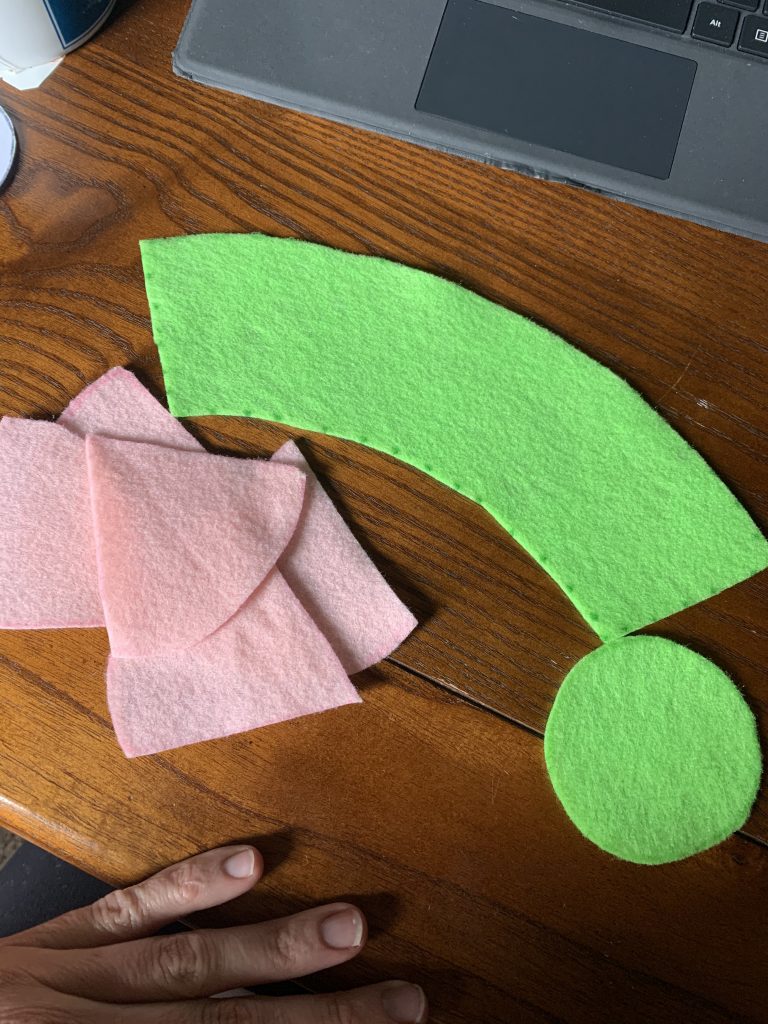
Scissors, Glue Stick, Chipboard (cereal/snack box/cardboard), Masking Tape, Tissue Paper or Crepe Paper (various colors), Pencil, Ruler

More Minis – A Cupcake!

We’ve added a mini cupcake to our miniature collection and made a tutorial so you can too. It’s ridiculously cute.

Here’s the printable pattern:

First, cut your pieces. Then, create a jagged zig zag line at the top of your cupcake wrapper.

Next embroider a bunch of parallel lines to create the pleated look of the cupcake wrapper. You can jump from line to line as long as you only do so on the inside of the wrapper so you have clean lines on the outside. Then, fold it right sides together and sew the open side shut, like so:

Next, sew the bottom circle into the bottom of the wrapper while it’s still inside out. Then, flip it around and your cupcake wrapper is complete!

Now it’s time to sew the cupcake top. Start with two triangles, right side them together and sew one side shut. Then, open them up and add in the next pice, sewing them in one by one, always right sides together.

Continue until you’ve gotten all the way around and sewn the last piece shut to the pice you began with.

Next, we want to make some small tucks around the sides of the cupcake top so that it will fit into the cupcake wrapper. On each seam, make a very small fold and stitch it in place. Don’t over fold, because we want it to fit on top of the wrapper nicely.

Now we get to put the cupcake into the wrapper! Place it just inside the top of the wrapper and pin it in place. Then, sew around using a running stitch, leaving a small opening for the stuffing.

Once it’s stuffed, close the hole.

Now, twist the top of the cupcake until you have a nice swirl and it has more of a point at the top and stitch it in place.

Apparently it already looks super delicious!

Next step is to make a swirl around the top of the cupcake with some sparkly hot glue and add some gems, seed beads, or anything you have that will look like sprinkles. We made small felt cut outs for ours because that’s what we had!

If you want to add a little face like we did, go ahead and cut out a mouth, glue on some googly eyes, and voila! Cutest mini cupcake ever?!

As always, let us see all your mini everything! Thanks for following along!

Radial Design Project

A radial design is based on a circle, with a balanced design extending from the circle’s center. Our teacher Maria Cruz made this video with easy to follow step-by-step directions oh how to create your own at home. There are so many different options and designs to explore with this project, so make sure to try a few different patterns out and have fun!

Materials:

A plate, pencil, paper, vellum tracing paper, scissors, eraser, tape, and either colored pencils, watercolor, or markers.

Hope you all enjoy this tutorial, and make sure to share what you create!

Our Final Grab Bag – Mermaid Lands

We wanna start out with a HUGE THANK YOU to everyone who took part in our grab bags over the past 8 weeks. It’s been a lot of fun to see everyone staying creative at home and turning to the arts while we navigate through these strange times. It’s become more clear now than ever how important the arts are!

These last bags turned out amazing! Absolutely love how everyone used their shells in so many different ways and especially love all of the wooden peg mermaids (and the scuba divers too)! There’s some really magical stuff going on. Let’s check them all out!

Bria:

Cat:

Emmy:

Julia:

Maddie:

Sloane:

Siggy’s Tiny Art Show

WOW! You guys. This show turned out better than any of us could have imagined! We had 18 entries! A HUGE thank you to everyone who participated in this incredible tiny show. Check out all of the photos and videos of her private showing, and stay tuned for info on where to view the collection in person shortly. Siggy was so pleased with all of the fantastic bearded dragon renditions of famous works as well as the contemporary pieces that she inspired. What a treat! Hope you all enjoy this as much as we did!

Siggy even had some friends come out for the show!

Please enjoy this video of her private viewing of the opening:

And, of course, some up close shots of all the incredible pieces.

Tiny Art Show Grab Bag

This miniature gallery grab bag was inspired by @tinyartshow on instagram and you guys really delivered! I love the themes that came with the collection of work–ocean theme, nature theme, and some seriously colorful pop art vibes! Great job all around, really.

We have one more week of grab bags coming up! Thank you to all who have been participating and keeping the creativity going at home! Now, let’s see those art shows.

Cat


Julia

You don’t wanna miss out on the puppy eating the art off of the wall at the end, folks.

Sloane

The Sewing Lesson that Nobody Asked For – How to Make a Platypus

Cause why not?

Here’s our printable platypus pattern. Make sure the pattern prints to a full 8.5×11.

First, cut your pieces from your fabric and place the body pieces right sides together.

Whip stitch around the outer edge leaving the top of the head open. (The head is the wider end). Then, flip it right sides out. Use a pin or a needle to pull out the four leg points so they stick out nicely.

Now, on to the bill. We used embroidery floss to create the nostrils, although you can draw them on as well. Place them together and whip stitch around the entire bill, leaving the bottom open.

Then, stuff both the body and the bill. Don’t stuff the tail too tightly, because we will make some cross hatch stitches through the whole tail at the end.

Now we want to attach the bill to the head. Put the head of the body into the open part of the bill, and whip stitch the bill to the body. Stitch across the top and then across the bottom, back to where you began.

Using a thick thread like embroidery floss, make straight parallel lines through the tail, and then do the same facing the other direction to create a cross hatch look.

Now let’s add in the feet! One by one, twist the bottom part of the foot. Using a pencil, line it up with one of the points and push it into the body so that the bottom of the foot is sucked into the point. Then stitch it in place.

Siggy’s Tiny Art Show

Hi Everyone! Do you know Ms. Amy’s bearded dragon, Ms. @siggy_sue? She is quite famous around the studio. Children LOVE to make her clothing, accessories, furniture, anything you can think of. She has quite the wardrobe and apartment.

So, that brings us to ‘Siggy’s Tiny Art Show,’ inspired by @tinyartshow on instagram! Students will create a bearded dragon themed piece of art (extra points for recreating famous artworks) and give it a decorative frame! We love gold frames, just sayin’. Then, Ms. Amy will curate a tiny art show for Siggy Sue’s viewing pleasure.

We have created a template for you to print. Or, just follow the size guidelines on this sheet.

RULES

1.) Use one of the templates attached for your mini art: Oval, Circle or Square. 
2.) Use any medium to create a work of art that involves Bearded Dragons – you can use any type of paper or mini canvas as long as it is equal to or smaller than the template size. If you are feeling very adventurous, you can even create a small sculpture!
3.) Add a FANCY frame to your work… bonus points for golden frames!
4.) All artwork is due to the drop box at the studio by May 8th at 12pm!
5.) Our show will be live streamed online May 11-15 and available for mini viewing outside the studio for a big gallery opening once the quarantine is over. 
6.) All participants will receive a Siggy’s Art Show tee shirt featuring the art from the show!!
7.) Please email jaimee@paintboxartstudio or amy@paintboxartstudio so we know you are participating!

“Siggy Lisa” by Ms. Jaimee

Here is Siggy eagerly awaiting her show:

Follow along on our instagram for more updates and information! @paintboxartstudio

Mini Turtle Pin Cushion (or stuffie!) Tutorial

Everyone needs a turtle pin cushion, right? So let’s make one! Here’s our printable pattern and tutorial! 🙂

First, start by cutting out all of your pieces. And there’s a lot! Then, we’ll sew the shell first. Take the middle of the shell and one of the side pieces, and right side them together, lining up the top of the side piece with one edge of the top piece. Then, whip stitch it together and repeat that step with all 5 of the side pieces.

Next, sew each side of the side pieces together to close the entire top of the shell.

Now that we’ve got the top done, time to sew the legs, head, and tail. Simply whip stitch all the way around leaving the bottoms open, flip right sides out and add a bit of stuffing.

Now it’s time to pin them into the shell. It is important to note that the turtle head and tail can be flat or sideways depending on how you insert them. The green turtle has a sideways head and tail, and the orange turtle has a flat head and tail.

Inset them all facing inward to the right side of the shell, and pin them in place, like so:

Simply flip the tail and the head sideways if you prefer the orange turtle.

Next we want to prep the bottom of the shell. Take one piece of the bottom, and fold in the flat edge according to the seam allowance on the pattern. Pin that down, and line up that half right sides together with the top of the shell, closing the legs inside.

Whip stitch around the outer edge making sure you are sewing far enough in to capture the legs, tail and head! Then, line up the second piece (no need to fold the flat edge this time) and sew that down as well. The flat edge of the second piece should just cover the fold of the first piece.

Time to flip! Once you’ve got it right sided out, fill it with some stuffing. Then, tuck in the edge of the unfolded side and stitch the hole shut.

The last thing to do is add your eyes! Either draw them on, or glue on some googlies! Cutest turtle ever? We think so!

Grab Bag 5 – My Mini Shop!

We’ve really got some fantastic mini shops here! SO good that we had to choose TWO winners for this week. Congratulations to Billie and Julia with “Billie’s Bedazzled Bakery and Desserts,” and “Ziggy’s Pet Paradise!” Can I come shop now??

Let’s check out everyones great work:

Billie with “Billie’s Bedazzled Bakery and Desserts!”

Emily with “The Super Super Market!”

Julia with “Ziggy’s Pet Paradise!”

Leo with “Buddy’s Big Shop!”

Maddie with “Nooks & Cranny!”

Nora with “Seaside Smoothies!”

Sloane with “Sloane’s Clothing Shop!”