Sew at home with me

Hi all! I am so sorry this has taken so long for me to get up!! Figuring out zoom and zooming all day is my new passion. I hope everyone is staying creative at home. No? Well, let’s do some doll sewing together. This project is good for girls, boys, parents.. whoever. You can adjust the pattern to make it your own.

Background of Doll Making Madness

We started construction on our house on March 9 and so when the stay-at-home order came in we decided to come to our house that has a roof in Mammoth. So, I am surrounded by natural beauty but so far from all of you and so far from all of my crafty tools.

Since so many of you are home without any crafty tools of your own, I wanted to create a hand sew project that you can make with just a needle, thread, a pattern(included below), some kind of fabric from your house and something to stuff the darn thing with.

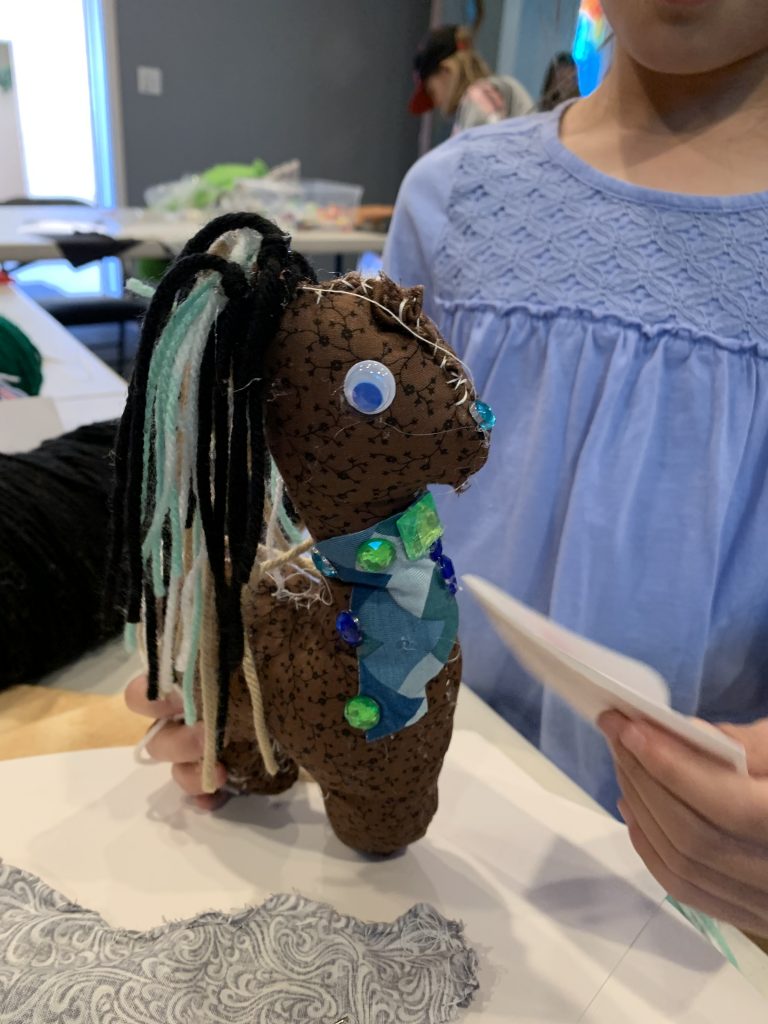
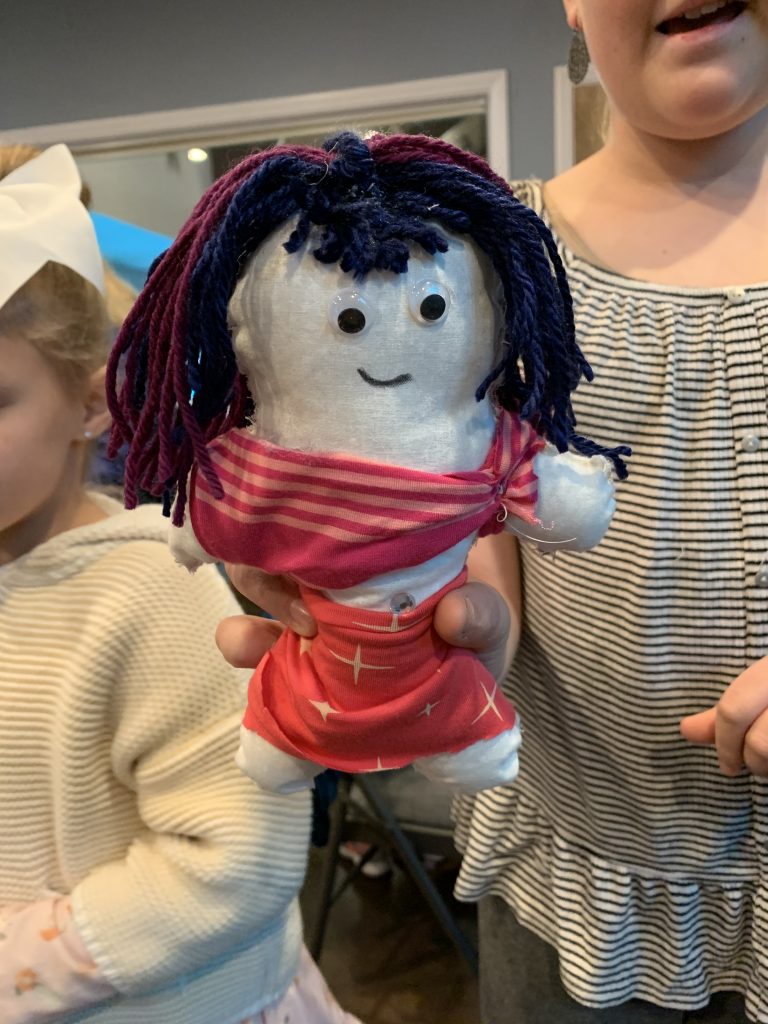
The possibilities are endless..

SUPPLIES AVAILABLE!** If you need supplies for your doll-making and are not able to dig them up out of a drawer or get them at Vons'(that’s where I got some of mine!) then I am happy to have a member of my team create a bag for you. We have more than enough fabrics, needles and thread, embroidery floss, hot glue sticks, eyes, yarn.. you name it. If you’d like to swing by and pick up a bag curbside please let me know and we can put together something special for you!
OK! Without Further adieu, here is the lesson! 
PATTERN:I have included the pattern for our basic body doll and also our horse doll, as it is a big time favorite around these parts. If you want to add ears to the regular doll to make a cat, dog or what have you doll – you can do that after you sew up the doll. If you desire to add a unicorn horn or wings to your horse you can do that too! But, after you sew the body is the best time. PRINT THE PATTERN: make sure when you print this pattern, you select to have it fill a whole 8.5×11 page. that will give you the correct size. 

MAKE YOUR OWN: You don’t have to use mine. You can make your own (a la sourpatch kid or camelcorn above). If you are making your own just make sure you remember to leave at least a 1/4″ seam allowance around the outside. If you are making an adjustment using the basic pattern – perfect. Just fold it in half and trace it onto half of your paper. Then, make your adjustments. Hold that half up in front of a sunny window and trace the other side. I made an alien today for my zoom class and it was fab. More on that later.

IMG_9275.jpg
IMG_9276.jpg

Cut on the outside line – that is the seam allowance line. Why are the extremities(arms and legs) so big, you ask? Once we sew and turn inside out, we need the legs to be nice and big so we can turn them inside out and stuff them. 
SUPPLIES FOR LESSON

IMG_9289.jpg

I was able to find these things at Vons.. I ordered my supplies through Michaels.com but it has not arrived yet since I am in Mammoth. So, I had to get creative! Luckily, the supermarket has these items! I bought the cotton balls to stuff my doll in the meantime while I wait for my Michaels order! They also do curbside pick up. Again.. see above offer to create a bag of supplies for all of you!
FABRIC:I did not have any fabric present but was lucky enough to have a handful of old dish towels that I had brought up here! I was very excited to see this deer dish towel and that is what I will be using for mine. Super cute! You can use any woven fabric that you have around the house.. that is, fabric that doesn’t stretch. Some examples include old sheets, pants, shirts. Anything that doesn’t stretch. You know I am partial to anything that has a little print on it, too. That makes your doll so much more interesting!
STEPS1.) Cut out your pattern on the outside line. 2.) Lay out your fabric. Place your pattern on your fabric, trace and cut 2!**DO you lay the pattern in the middle of the fabric?? no! Make sure you put the pattern on the edge of the fabric so you can use as little as possible. check out my cute deer..

IMG_9282.jpg

3.) Once you cut these out, put the two shapes together with the *RIGHT* sides together. The ‘right’ side of the fabric is the printed side or the side that is meant to be facing out. If we put the right side of the fabric together, once we sew and turn right side out, the right side will be facing out. 
4.) STITCH TIMEok – it’s stitch time! See the pen marks below that resemble the type of stitch we are using. It’s the blanket stitch, which we all already know from class. With your thread you enter from one side, go through both layers then over the top and enter again from the initial side. You are always starting from the same side. *Make sure to keep your stitches small and close together so that once we turn it inside out, no fluff comes through. 

IMG_9290.jpg

** Threading your needle – remember, you can start your stitches without tying a knot. Most of you I have taught this too.. but we still have a few stragglers. Simply put a big piece of thread on a needle and pull through until the thread is even on both sides. Then, pull the thread through both layers until the tail of the thread has only 1″ left. Go around with your needle and make the first stitch, but don’t pull so hard as to pull the tail of the thread through. You will make a loop with your thread. Simply put your needle through the loop like you are tying your shoes. Repeat this step 2x and you will have a secure double thread to start your sewing with. I made a fab video of this and I will figure out how to get it to you!I will send a separate instruction with photos right now of threading process. 
5.) Stitch all around outside of doll. Leave a 1.5″ hole. The best place on the regular doll to leave the hole is the head. The best place on the horse is on his butt! Eventually, you will cover those spots with hair and a tail so any wonkiness won’t matter. 
6.) Make sure you tie off the end of your thread the same way you started!You cannot just cut the thread when you are done, the thread will unravel. Make sure to use an old fashioned knot or to do the loopy thing we started with. 
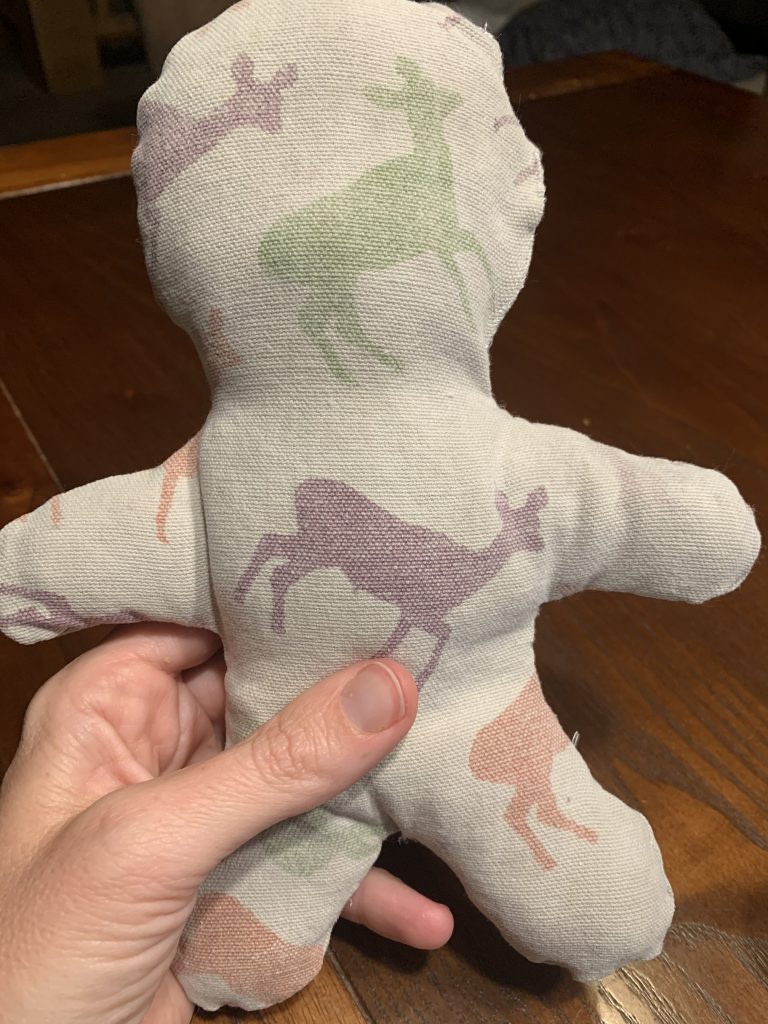
7.) When you are done sewing, you can turn inside out and stuff! If you are stuffing with puff balls, like my rag doll, Ava has taught me that the best way is to unroll the balls before stuffing…

ooh.. ahhh


This is enough of a task for all of our young sewists for this week!This is the base of our new creation. I cannot wait to see where you take it in coming weeks!!

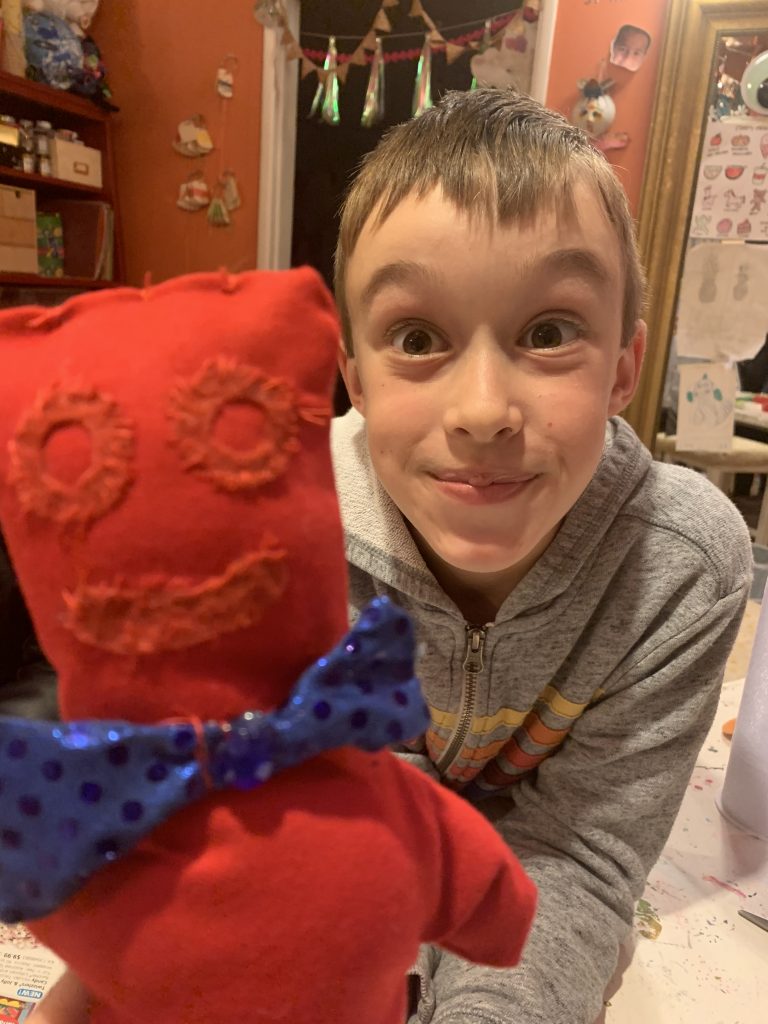
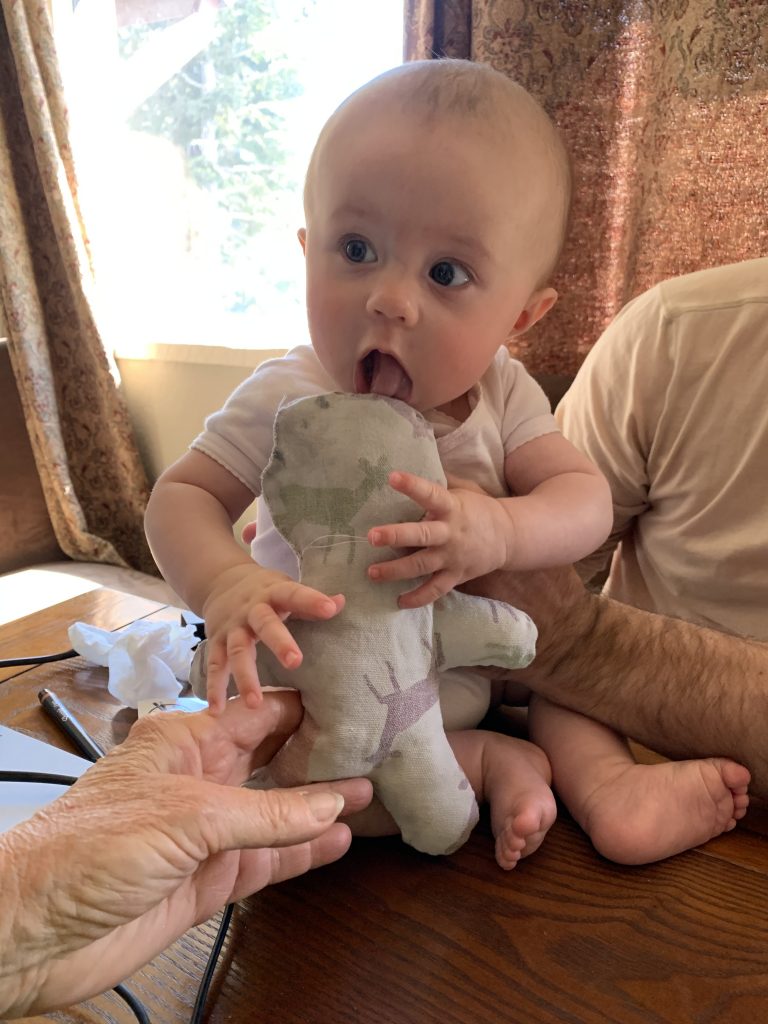
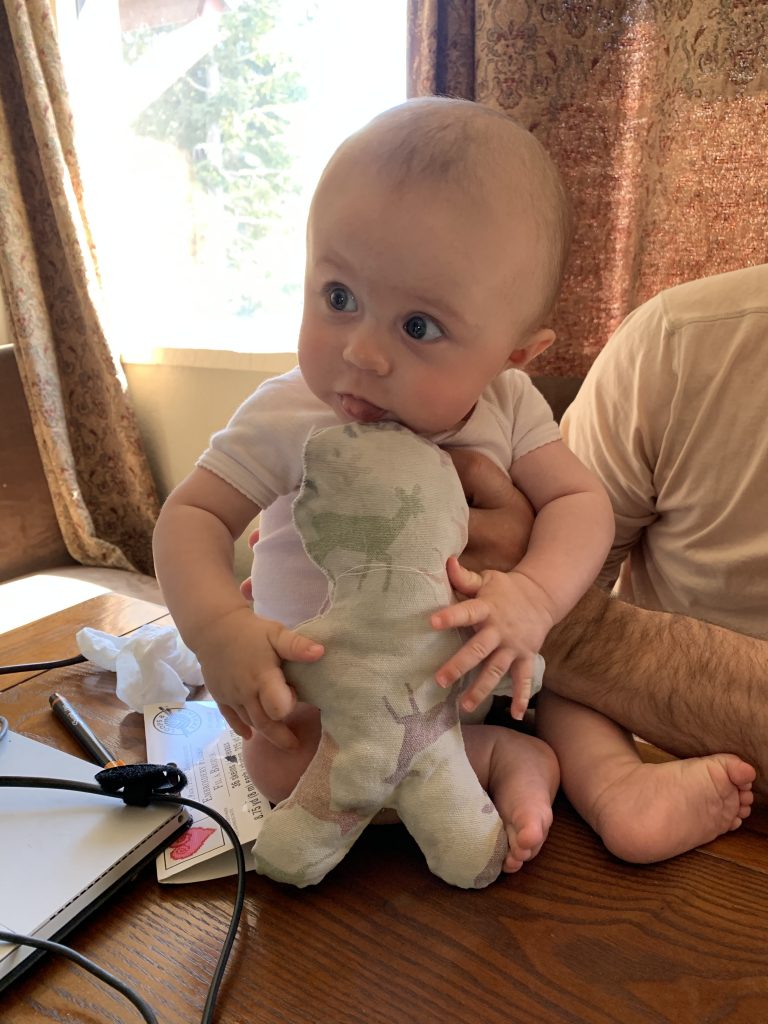
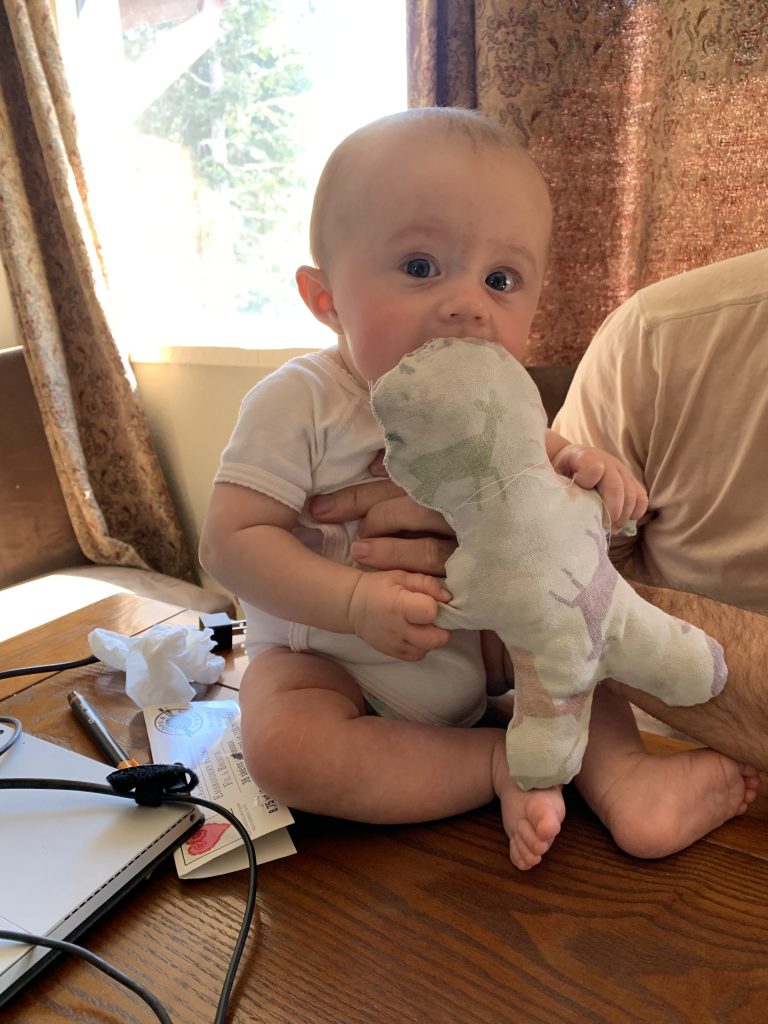
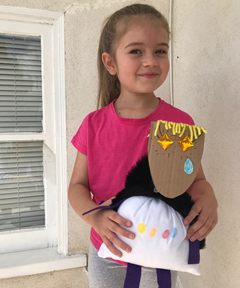
Here is my sweet rag doll that I have so far… decorating will come later this week!! Just so you know.. babies love this.

So get your needle and thread out and get your doll on! It would make my life right now to see random doll pics floating in!

If anyone is still reading.. I have a totally awesome hand sew class coming this friday! We will be taking our stuffy menu, making it mini and handsewing in a fabulous sewing circle over zoom. Get in on it! All supplies provided. Email me at jaimee@paintboxartstudio with questions.

Love to you all!!

Paint Box Grab Bag Challenge week 1

Paint Box Art Studio’s First Grab Bag Challenge!

From Ms. Amy: First off, a HUGE thank you to everyone who participated in our very first grab bag challenge! We couldn’t be more pleased with the amount of enthusiasm and support we received for this project, and we can’t wait to continue it…with themes!

There were so many awesome creations made.  From houses with hanging chairs, pools, lofts, and zip lines, to pottery, to bunny houses, to super-hero capes, to aliens and UFO’s, to a mini bowl and goldfish, I mean wow.  Can it even get any better than this?  Not sure, but let’s keep it goin’ anyway!

Hope you all enjoy the photos and videos we received of everyone’s completed projects, as well as Darwin’s process video!  Take a look at some pics, and make sure you get to the bottom to see who our first Grab Bag Challenge WINNER is (winner receives a free bag for this week and will be featured in the week’s process video for inspiration)!

From Jaimee: Thanks so much to everyone for participating; it really does keep us all connected and it means so much. I can’t help myself – I must comment on all of the participants below! To any of our participants from last week who still want to send pics over.. we can’t wait to see them! We will put them up when they are ready!!

Gallery of awesomeness : Grab bags week 1

Billie:

JB: Great job Billie! This is such a clean little world! So professional. I love the pink and black color story. Tres chic.

Cat:

JB: Cat – I love the details.. the animals are so totally awesome. Great work!

Mia:

JB: Mia! I’m obsessed with this purple guy and I really would like to keep him. Please? Great job – I love this photo on a rock. Totally looks like another planet!

Darwin:

Darwin – You rock!! I have three words for you .. Kitty Dance Party!! We can’t wait to see what you do next week!

For Anyone who wasn’t aware.. Darwin was kind enough to be our bag tester for this new Paint Box Challenge. We are so proud of her and she really stepped up and made a fantastic video for you all!

Supriya:

Amazing job Supriya!! Way to go big and use your cardboard from home. I love the 3 story effect. We can’t wait to see what you do this week!

Sadie:

Sadie – you thought so out of the box!! I’m so impressed. I love your doll, your use of the bag and I love your doll sounds. Cutie!!

India: “Queen Kitty”

India – you are so fab. Of course, you chose a kitty theme. I love the lights and the mood of this house for Queen Kitty!!!

Olivia:

Olivia! I hope you get your hammock bed and floating chair for your room. I love your details. You are so creative. I love how you used the bottle in the backyard. Awesome work.

Lila:

Lila – this project is so great. I am so impressed. It’s so fancy you can keep it forever. I love the details and that surprise room in the attic is so amazing. I want to live in there!

Emmy:

Emmy – You are the youngest participant and you did an amazing job. I love the details.. the lights in your room are so cool! Your video is so good.. I can’t believe how grown up you are making your own awesome house tour video!!

And the winner is………….. BRIA JONES!  The details are just unreal.  Waterfall, sandbox, a zipline, a poolside lounge, a picnic area complete with mini foods… and that’s just a start.  I definitely want to go to your pool party, Bria! Congratulations! You’ve won a free bag for next week and get to be our inspiration process video that we will post on Thursday!  Woo Hoo!!

Bria – what can we say… I cannot believe the details here. And, I love how your incorporated your favorite activity (swimming) into this project. It’s a hard time for everyone not being able to do their favorite activities and you are reminding us to keep the love alive for our favorite things. xxoo

Thank you SO much, again and again, for taking part in our challenge.  Can’t wait for the next!

NEXT WEEK’S GRAB BAG THEME: All about dolls!  Each bag will come with a pattern for a paper doll.  Everything you do with it will be up to you!  And, we challenge you to use ONLY what is in your bag this week.  Outfits, accessories, hair, hats, glasses, makeup, roller skates?  Anything

Check back to the blog later today and for the rest of the week for some new art and sew lessons to keep you all occupied.

Weaving at Home

Cardboard Loom Weaving

Hi everyone!  It’s me, Amy. Trying to stay busy by making things in my home all day long and excited to share a ‘how to’ on this cardboard loom weaving I made! Not only is it awesome, but the actual weaving is quite relaxing and satisfying, I find. Hope you all enjoy!

Materials: 

  1. Cardboard
  2. Yarn
  3. Tape
  4. Scissors
  5. Yarn Needle (Optional)

Step 1 – Make Your Loom

Grab an old box and cut a piece of cardboard to a size and shape that you would like your weaving to be.  Cut slits in each end of the cardboard like so:

Then, starting on a far side of the loom, tape down a piece of yarn to start winding into the slits.  After you have wound the yarn through the entire piece of cardboard, tape down the other end of the yarn, and you’ll be good to go!

Step 2 – Starting Your Weaving

Choose a yarn you would like to start with, and if you have a yarn needle, thread the end of the yarn through the needle and weave through your first line by going under, over, under, over, and so on.  Leave a small amount of yarn hanging off the edge.  We will take care of that later. When you turn back the other direction, make sure you are going under and over the opposite pieces that you were the time before.

Lightly pull your weaving down as you go so that the yarn stays close together.

When you finish your first color, trim off the end of the yarn leaving just a bit hanging off the edge of the loom.  Again, we will take care of this later. Begin with your next color the same way. You will see in the pictures coming that I used two furry yarns together at one point to mix some colors together. (This mainly worked because of the texture of the yarn).

Step 3 – Cleaning the Edges

This is where a needle is useful, but if you don’t have one, you can simply tie the edge of the yarn in a tight knot around the outer loom yarn.  If you are using a needle, simply thread the edge of the yarn, and pull it through the outer loops of your weaving. It’s best to pull it through the section of it’s own color to hide it best. Once it’s through, just cut and trim the rest!

Step 4 – Removing the Weaving

Turn your loom over, and cut through the center of the yarn on the back.  Then, start by pulling off just one end of the loom.

Take the yarn pieces two by two, and double knot them together.  This will keep the bottom of the weaving in place. Then, do the same to the other side of your weaving.  

Voila!  Your weaving is now fully secure and removed from the loom!

Step 5 – Finishing Touches

Now, this part is really up to you!  Depending on what you want to do with your weaving, you can either trim the edges of the loom yarn to make them even if you are making, say, coasters or a miniature rug for a pet or something that will be sitting on a surface.  I’ve decided to attach mine to a found branch so that I can hang it on my wall.

I flipped my loom over, chose which side I wanted to be the top, and laid the branch across it.  I used my loom yarn, again two by two, and knotted it around the branch so that the knots would be hidden in the back. Then, I trimmed the excess.

For the bottom of the loom, I decided to add in some more of the yarn I used to create the loom so that it would look much more full.  I simply tied pieces of the yarn through the bottom of the weaving and in between each knotted piece that was already there. Then, I cut all the hanging yarn so that it was even across.  This could be a fun place to experiment with different length fringe at the ends, or even add in some hanging beads!

Lastly, I tied a piece of yarn to each end of the branch so I could hang it on a wall!  How adorable, right?  

Make sure to share what you guys come up with! ☺