Multi Media Flower Vases

Collaged Multi-Media Flower Vases

Hi everyone!  Amy here. I have a fun lesson on collaged multi-media flower vases with a few variations that are easily done with at-home materials!  I did an example with oil pastel, watercolor and fabric scraps. But, there are plenty of things to use if you don’t have any of the supplies I mentioned.  We’ve done these around the studio a few times, so I have some kid examples to show as well. Let’s get started!

Supplies:  

  • Watercolor paper 
  • Oil pastel or crayons
  • Fabric scraps, magazine cut outs or coffee filters
  • Watercolor paints 
  • Scissors
  • Glue 

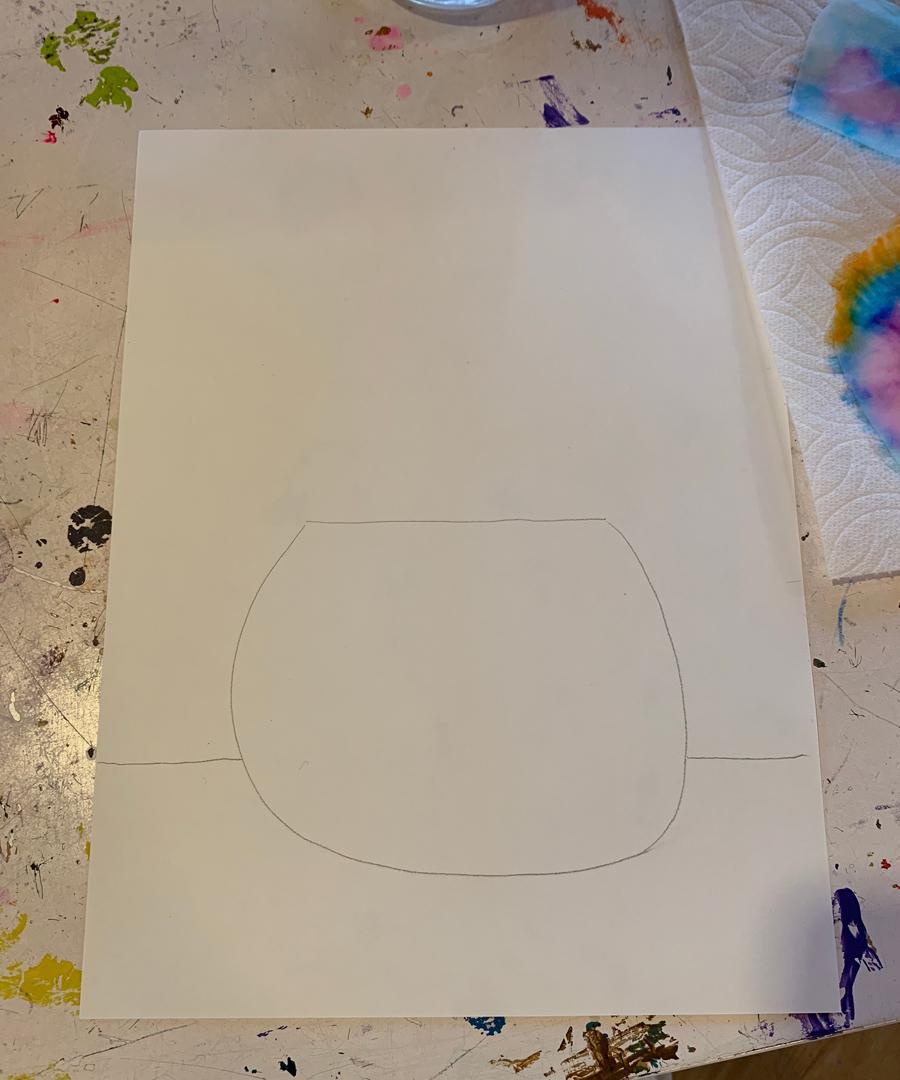
Step 1 – Drawing the Vase:  

(If you choose to make the coffee filter flowers, do that step first so they have time to dry while you create your vase—instruction at the bottom of the post)

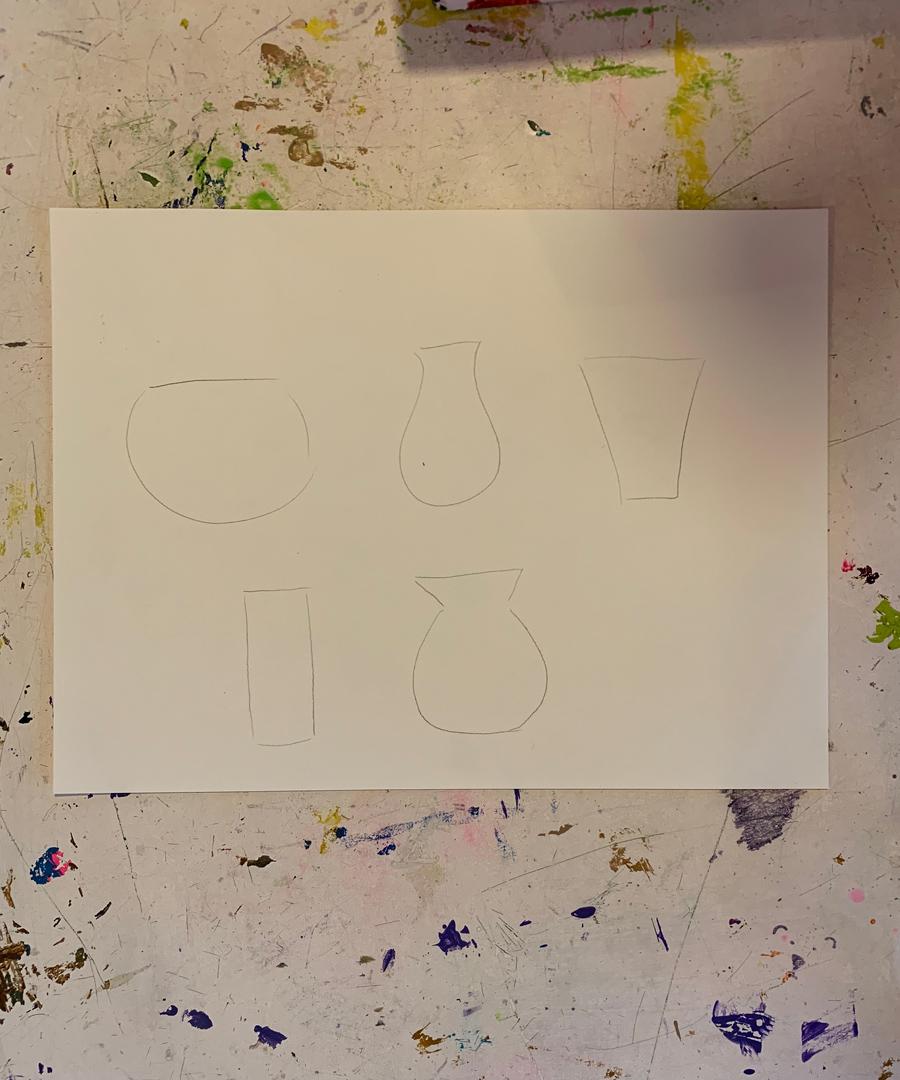
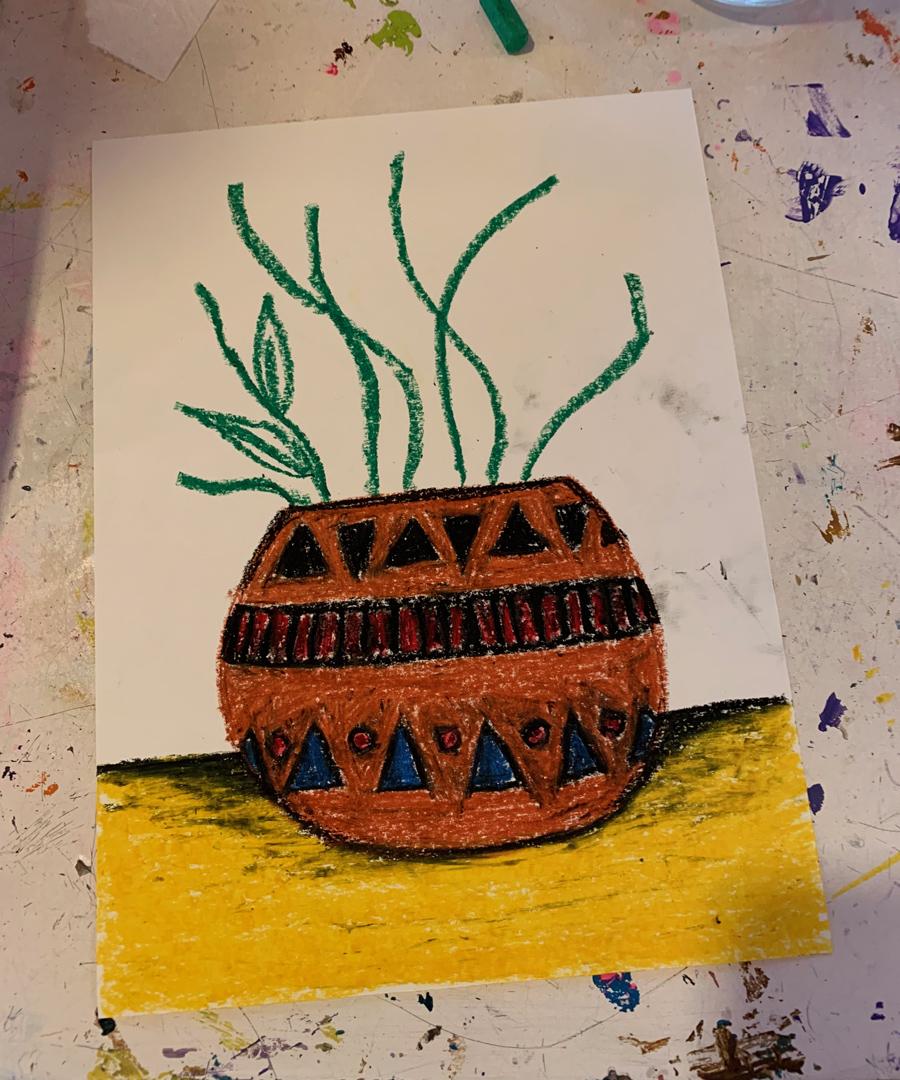
First, let’s start by drawing the vase we would like our flowers to be in.  I chose a round, short vase, although you can choose whatever you would like.  I drew a few vase shapes as examples to choose from. After you draw your vase on the bottom half of the page, place it on a surface (like a table) by drawing a line behind it.  

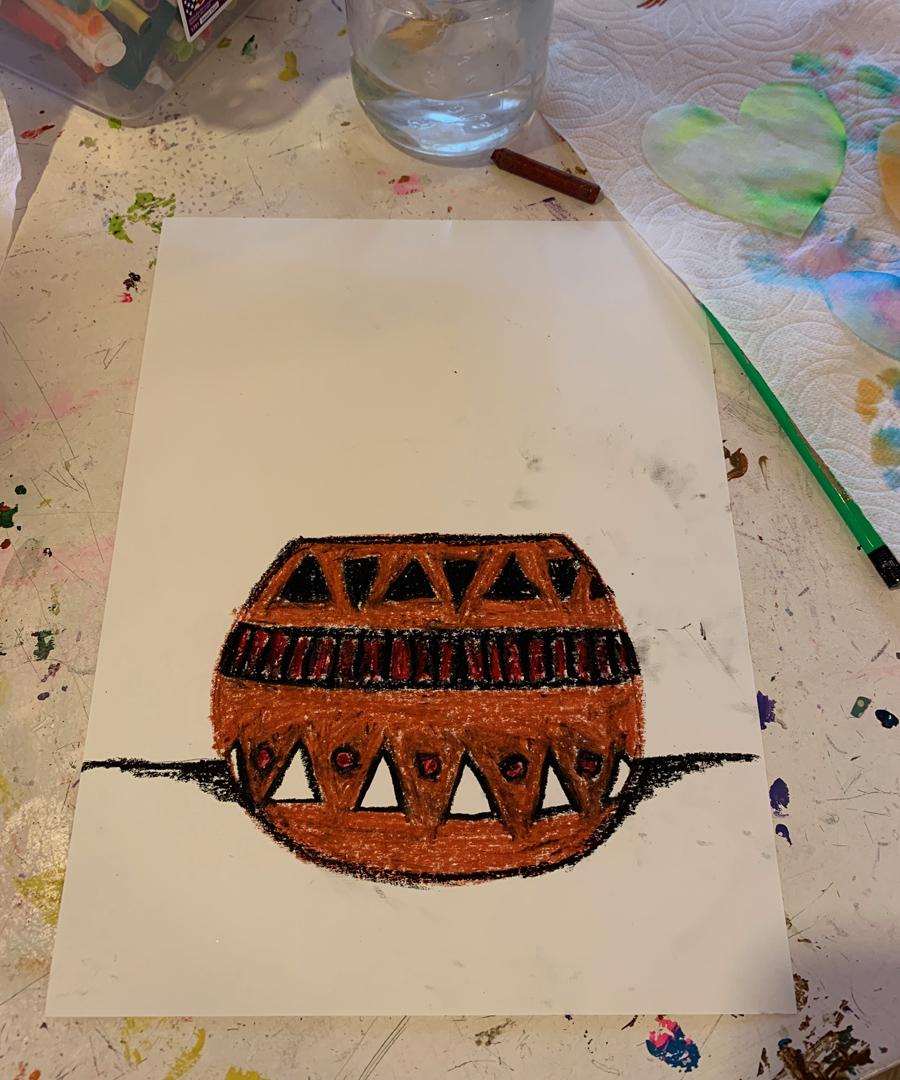
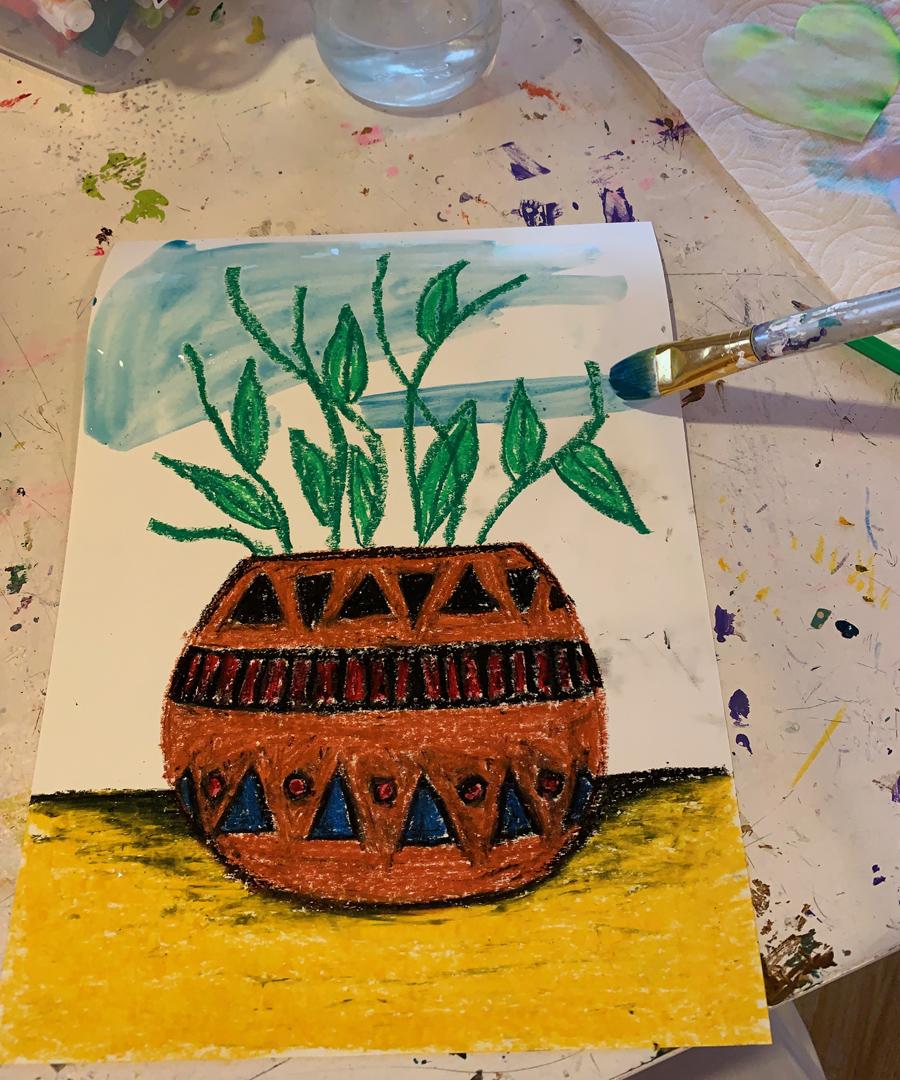
Step 2:  Color the Vase

I always like to put some patterns onto my vase, and I encourage you to do that too!  Some simple repeated shapes, lines or dots really give the piece an elevated look and complement the collaged aspect nicely.  I love oil pastels, so that’s what I’ve used for the example. Crayon is the next best thing if you don’t have any oil pastels.  I started by drawing a few simple patterns, chose a nice terra-cotta color and oiled everything in. After I finished the pot, I colored in the table. Notice the shadow behind the pot at the top of the table.  The shadow gives it some dimension so it looks as if the pot is sitting in front of the back edge of the table.

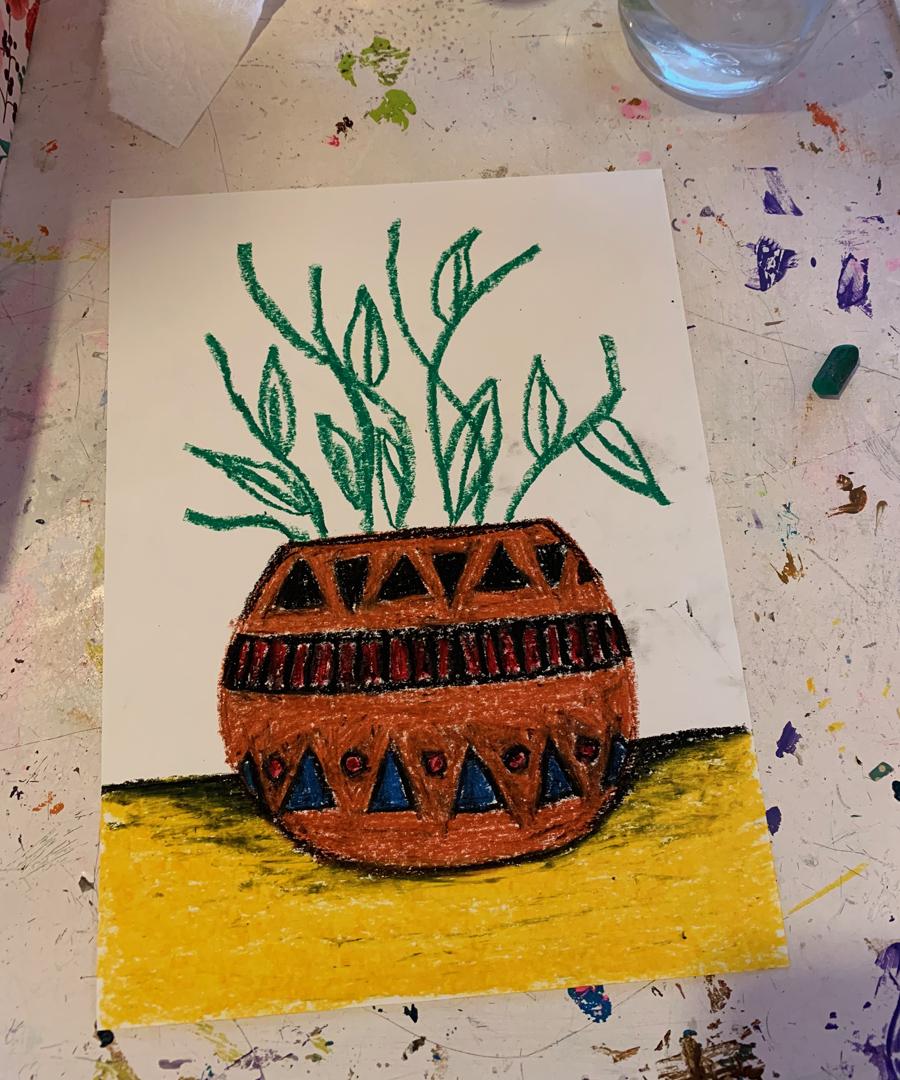
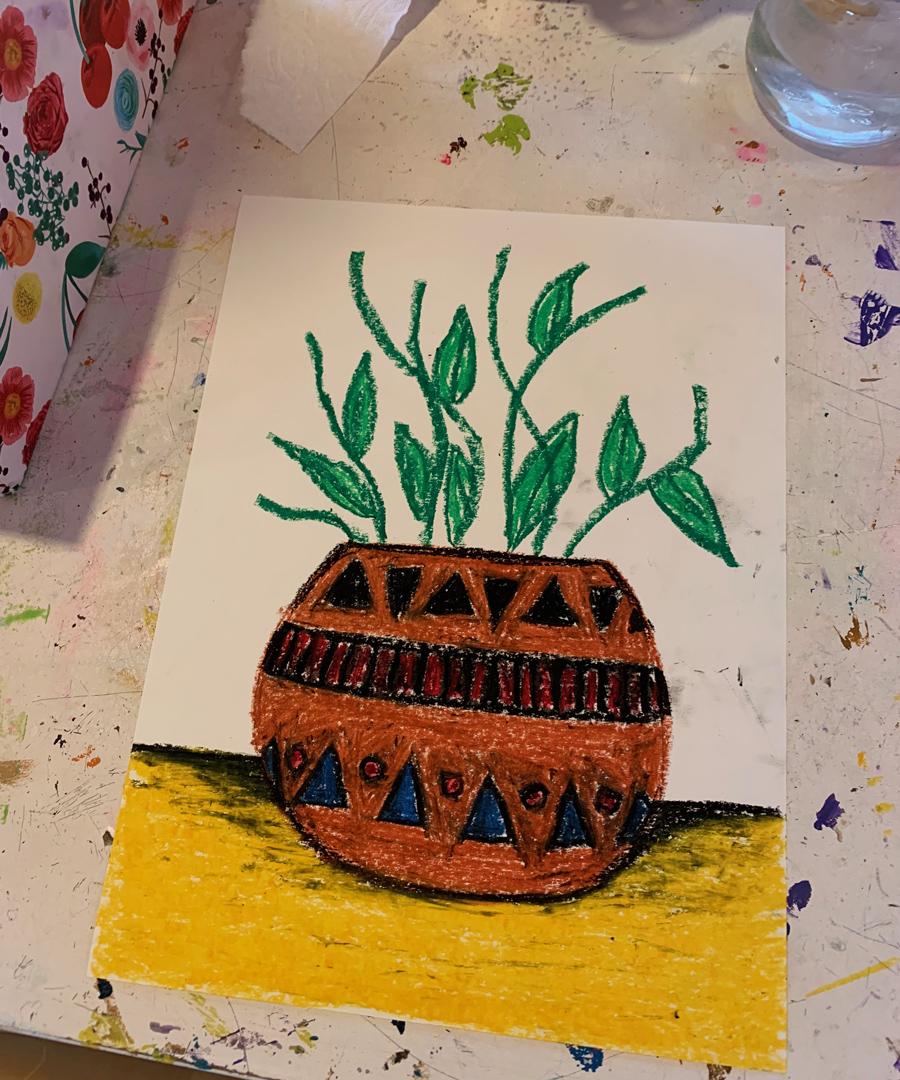
Step 3:  Add the Stems

Still using pastels (or crayon), I drew some stems coming out of the pot and added some leaves to give the stems a fuller look. I used a couple of different greens in the stems and leaves to create some more dimension here.

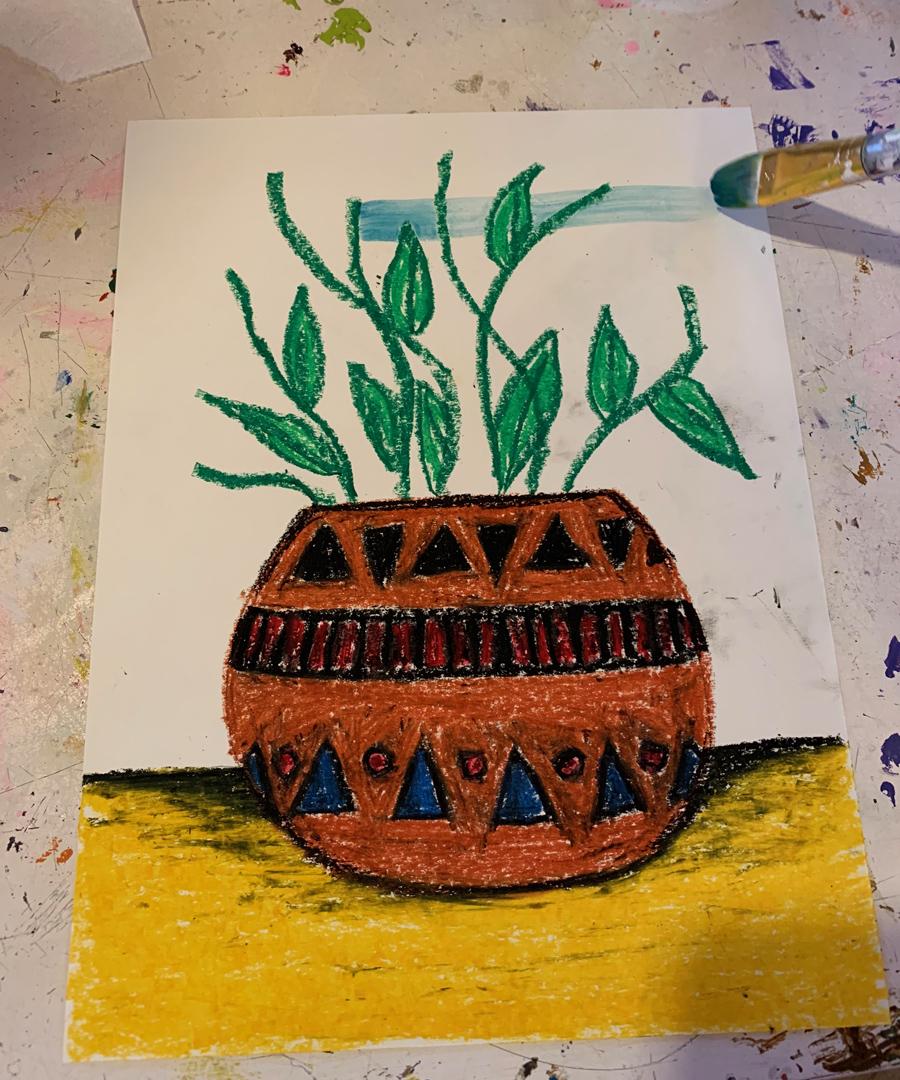
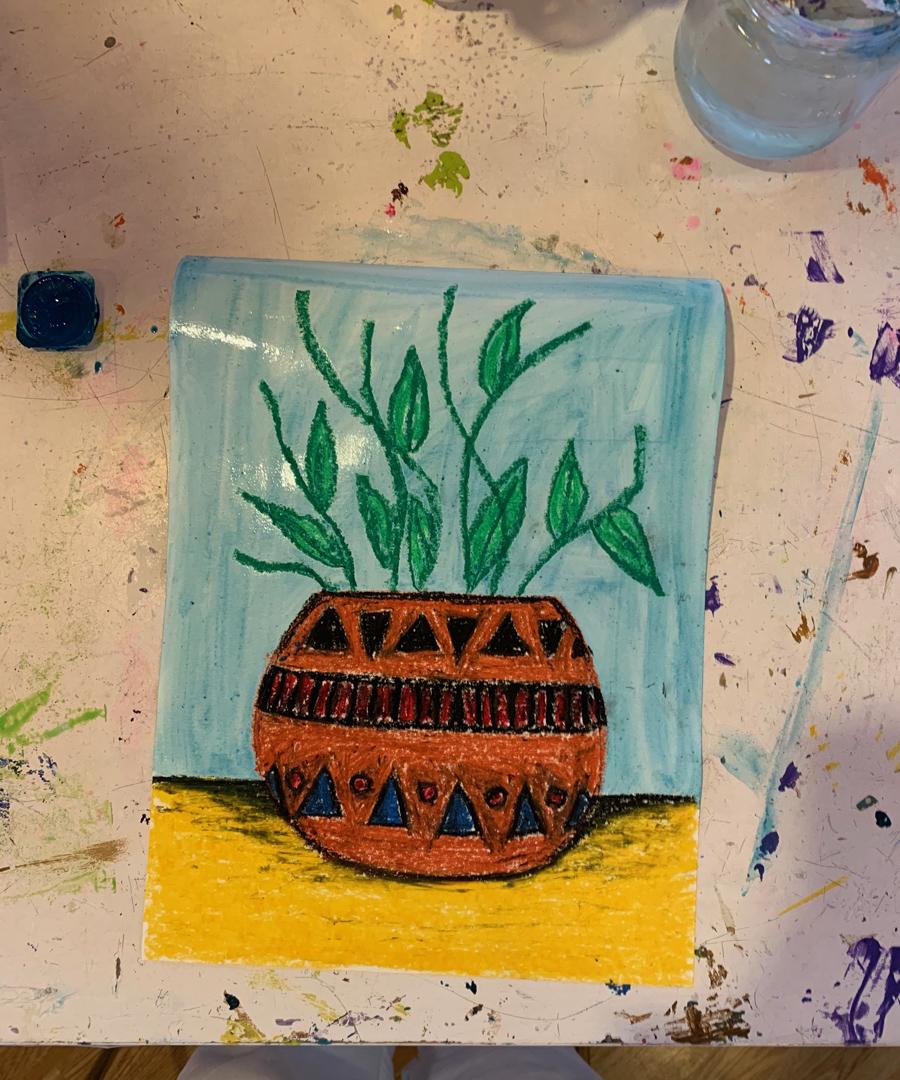
Step 4: Painting the Background

One of the reasons I love oil pastels so much is because of the way they repel watercolor paint. Since oil and water don’t mix, you can paint right over the top of the pastels, and they will show right through.  So, I quickly did a light blue wash over the background covering the rest of the paper that has been left blank.

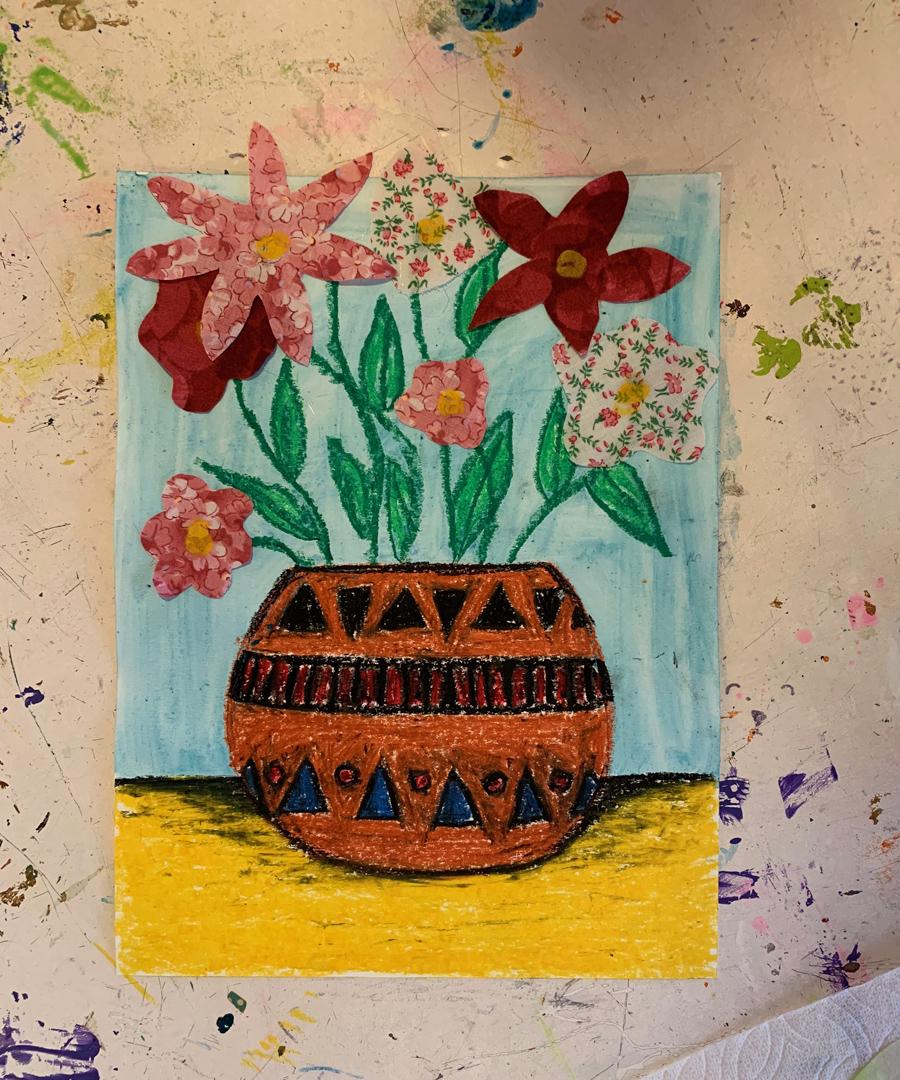
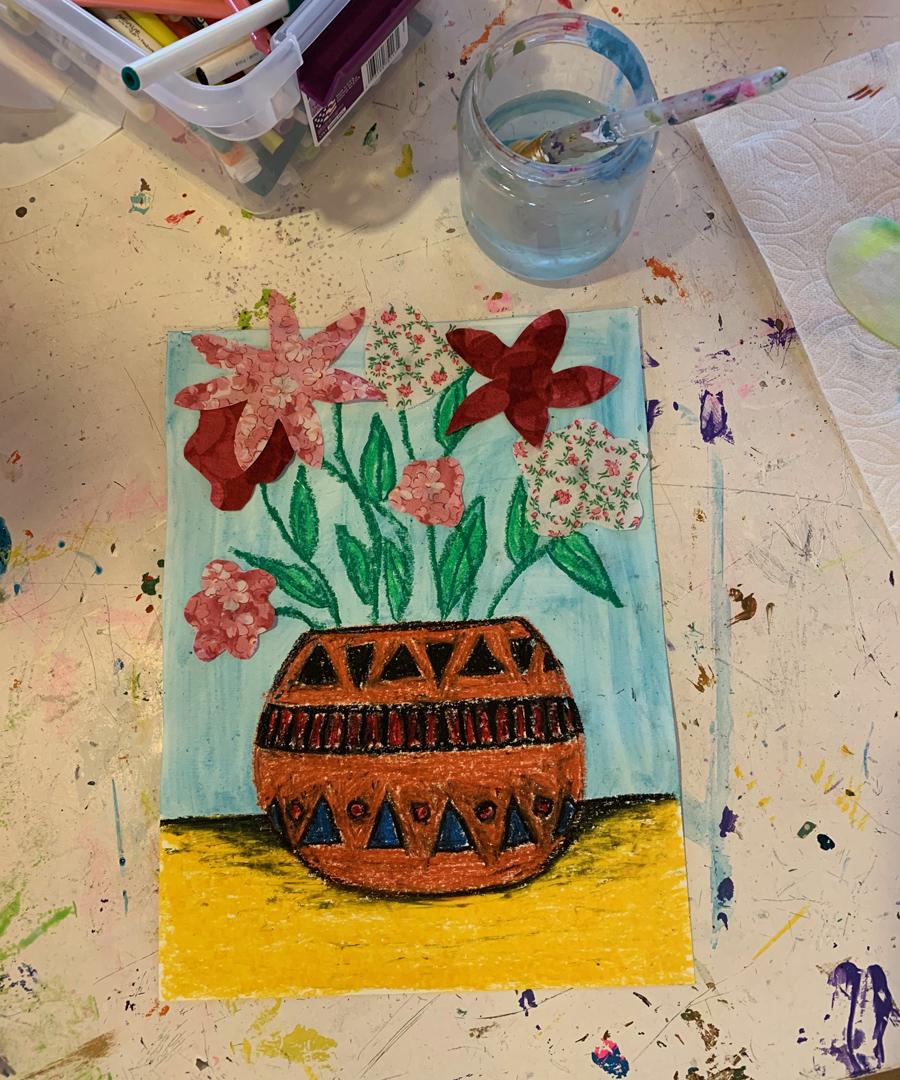
Step 4:  Adding the Flowers

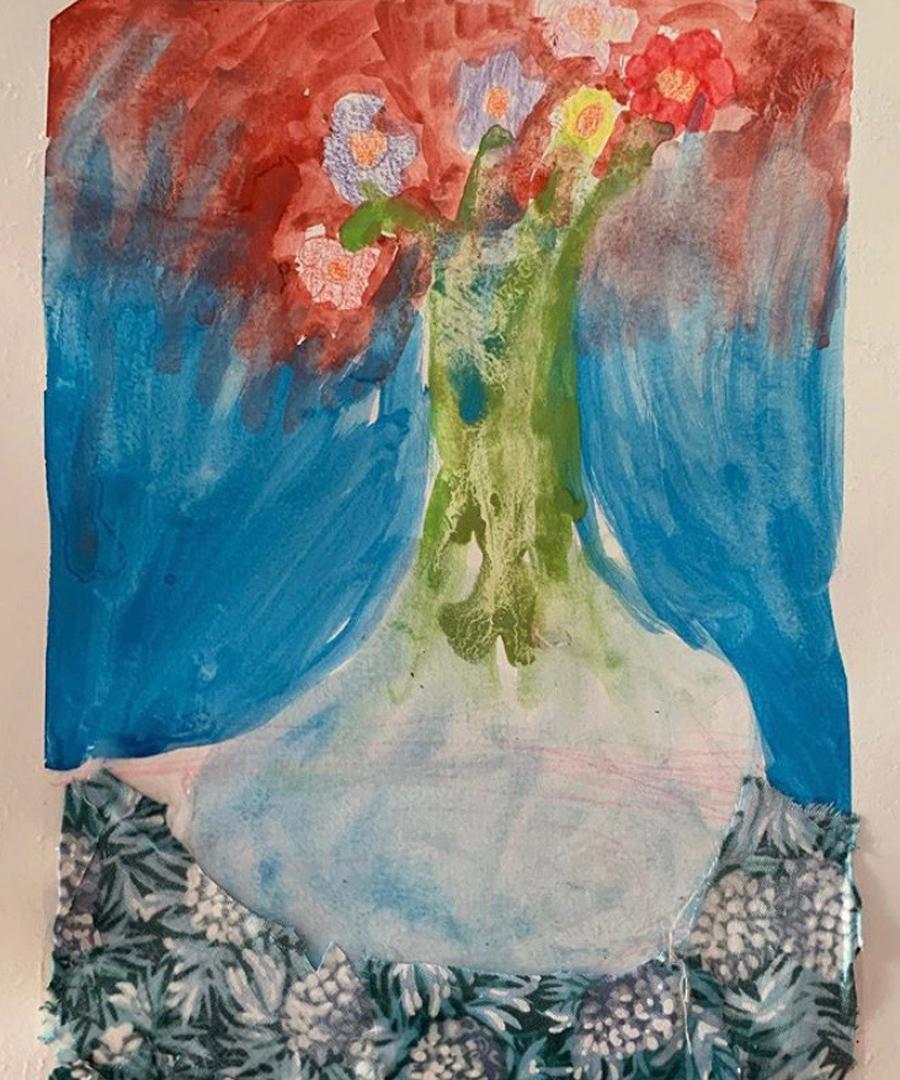
Lastly, I decided to use some fabric scraps to cut out the flower shapes for my piece.  I had originally planned to use the tie-dye coffee filters I had made, although after seeing how my piece turned out along the way, I decided everything looked much too bold to have the coffee filters on top. You never know how things will end up when you start, and it’s always good to be open to changing your mind along the way!  That’s the beauty of art. 

Cut out a few flower shapes (fabric scraps, coffee filters, magazines, other paper you may have painted) and lay them out over the stems until you have them placed in a way that is pleasing.  Glue them down, and then if you want to add anything in the centers of them, great! I added some yellow oil pastel centers.  

And that’s it!  Woohoo!  

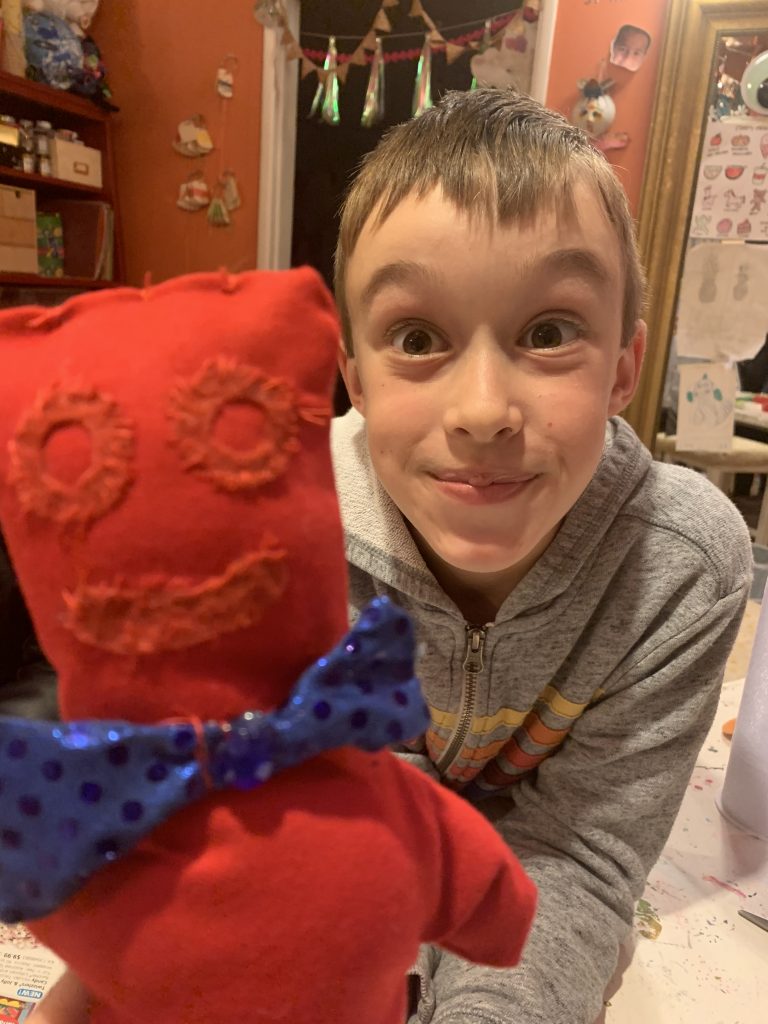
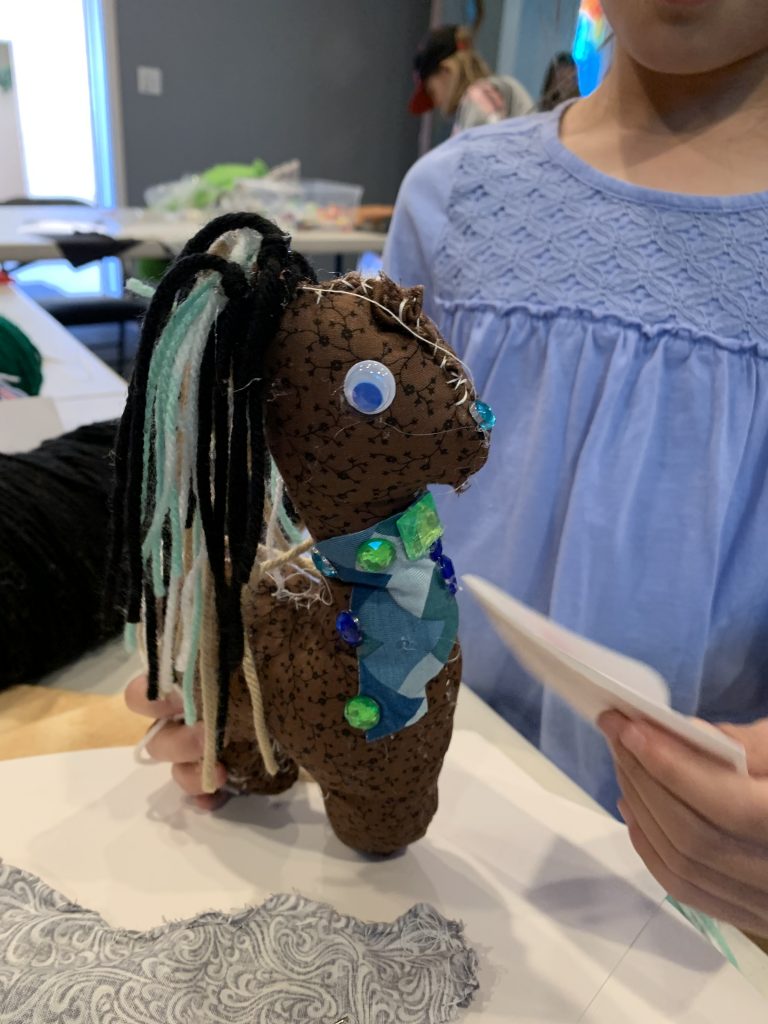
Here are some student examples:

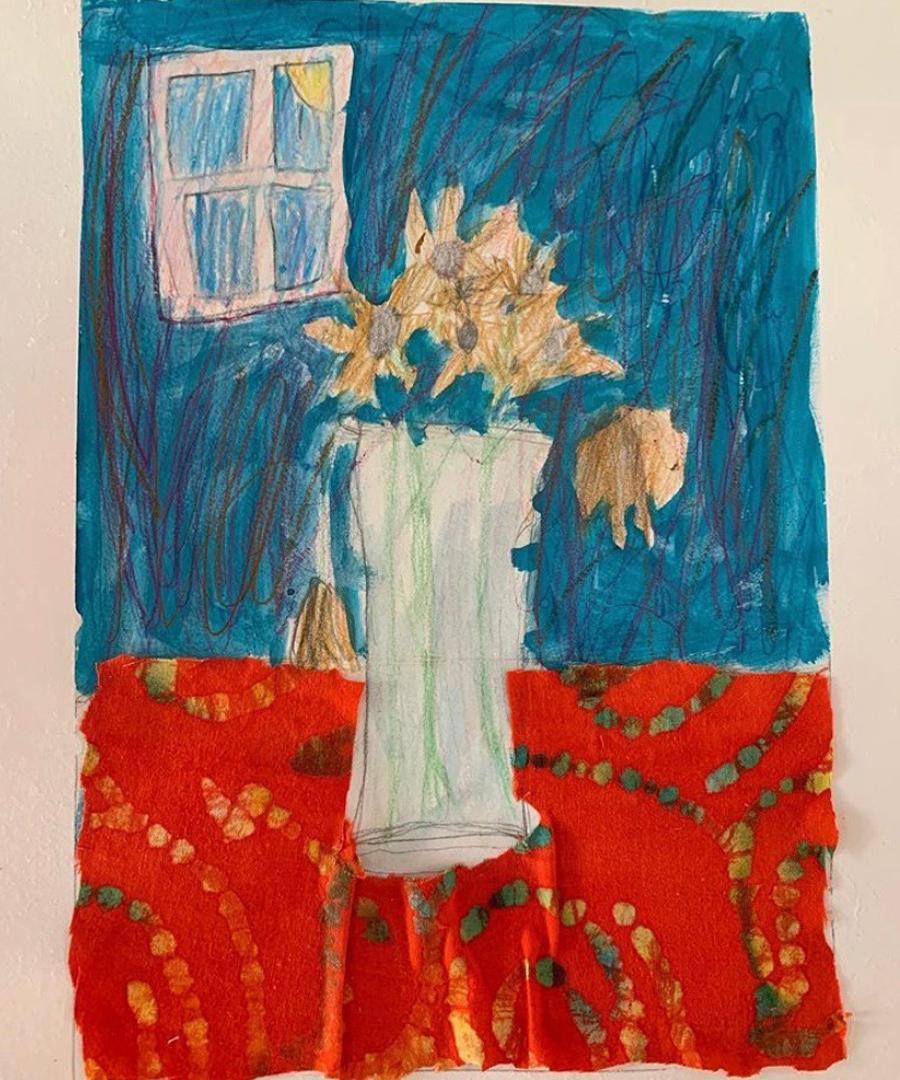
Fabric, colored pencil and watercolor

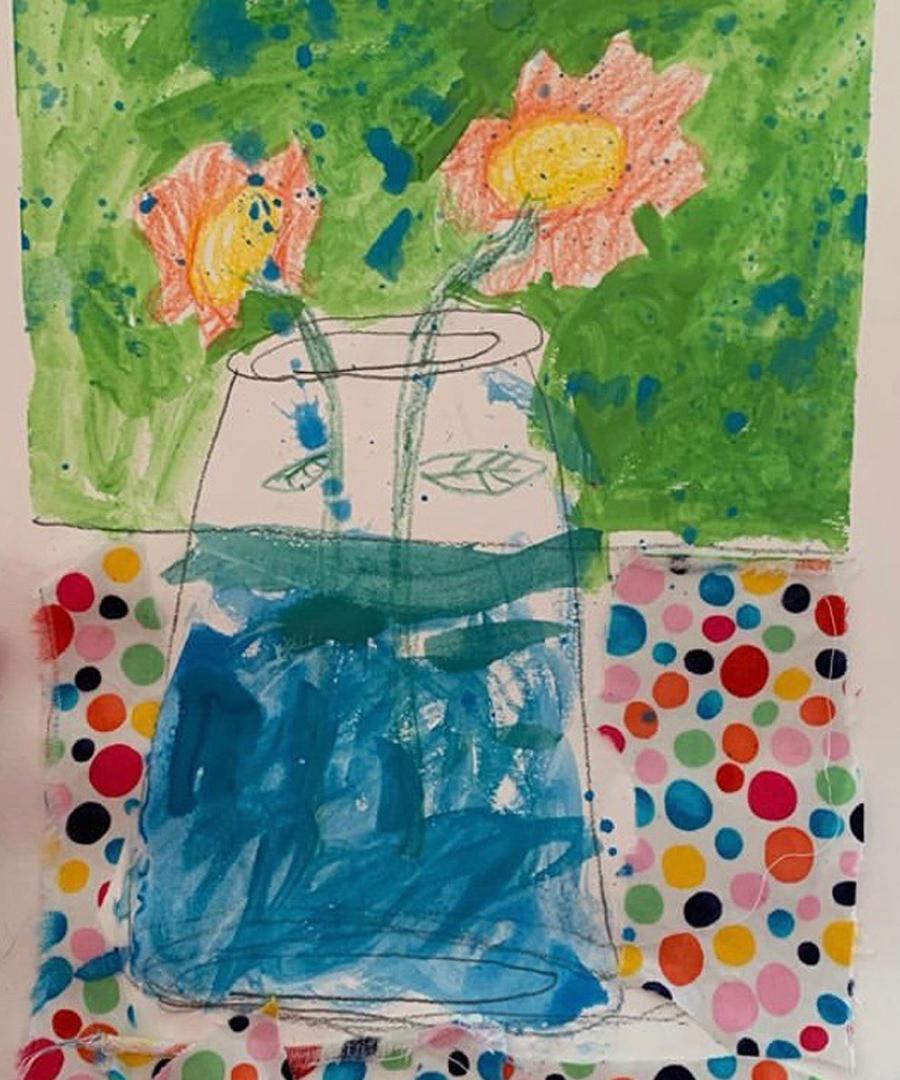
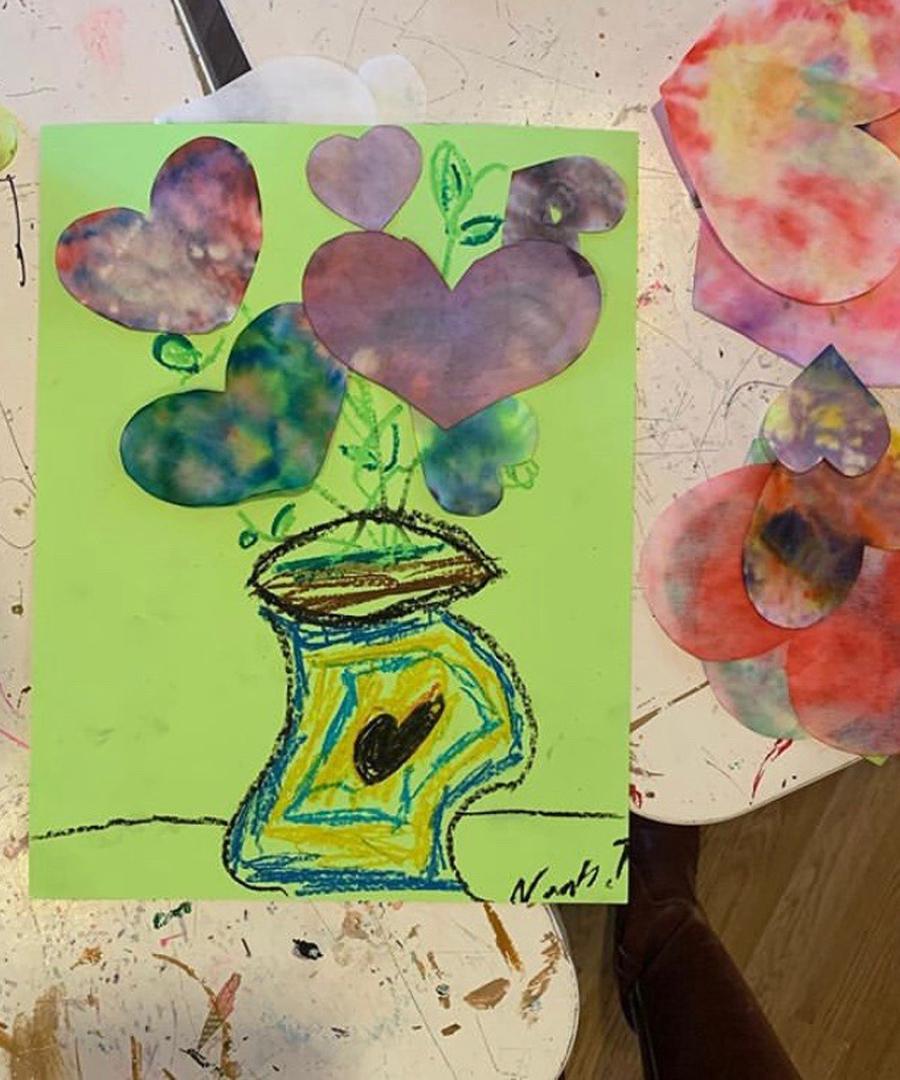
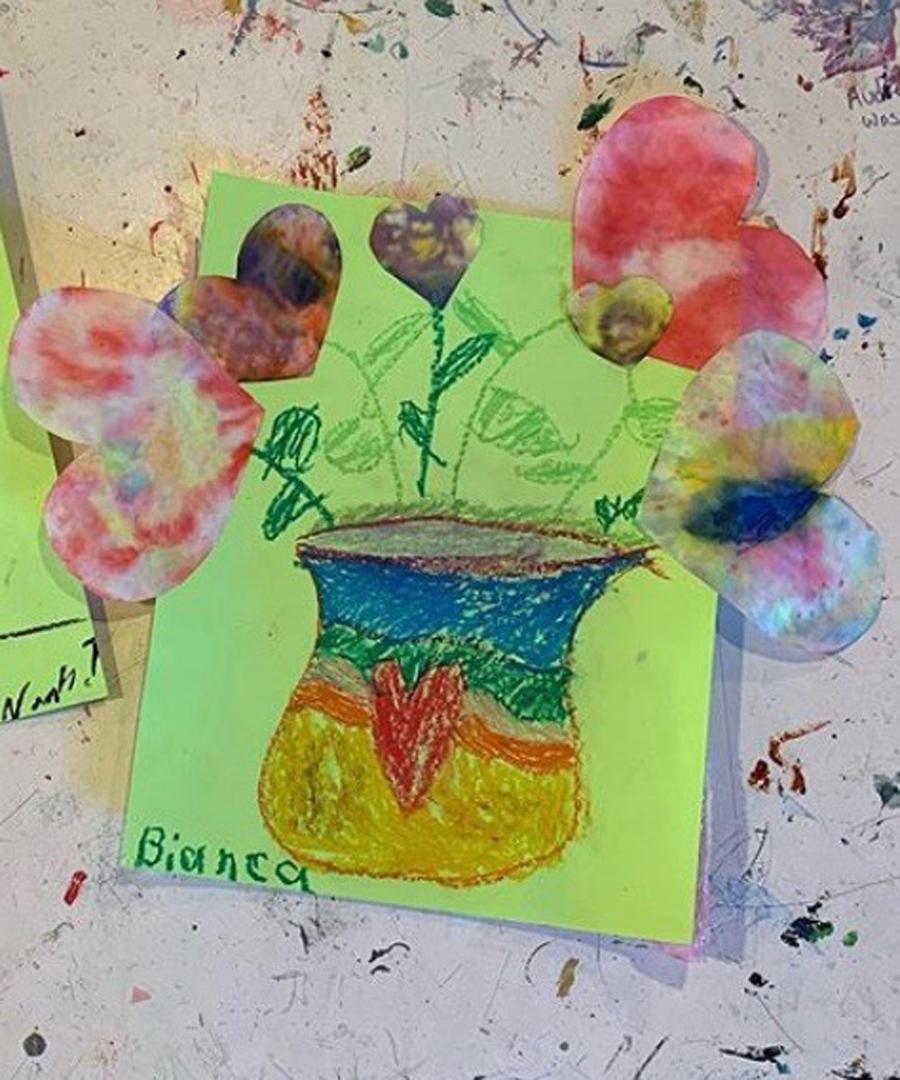
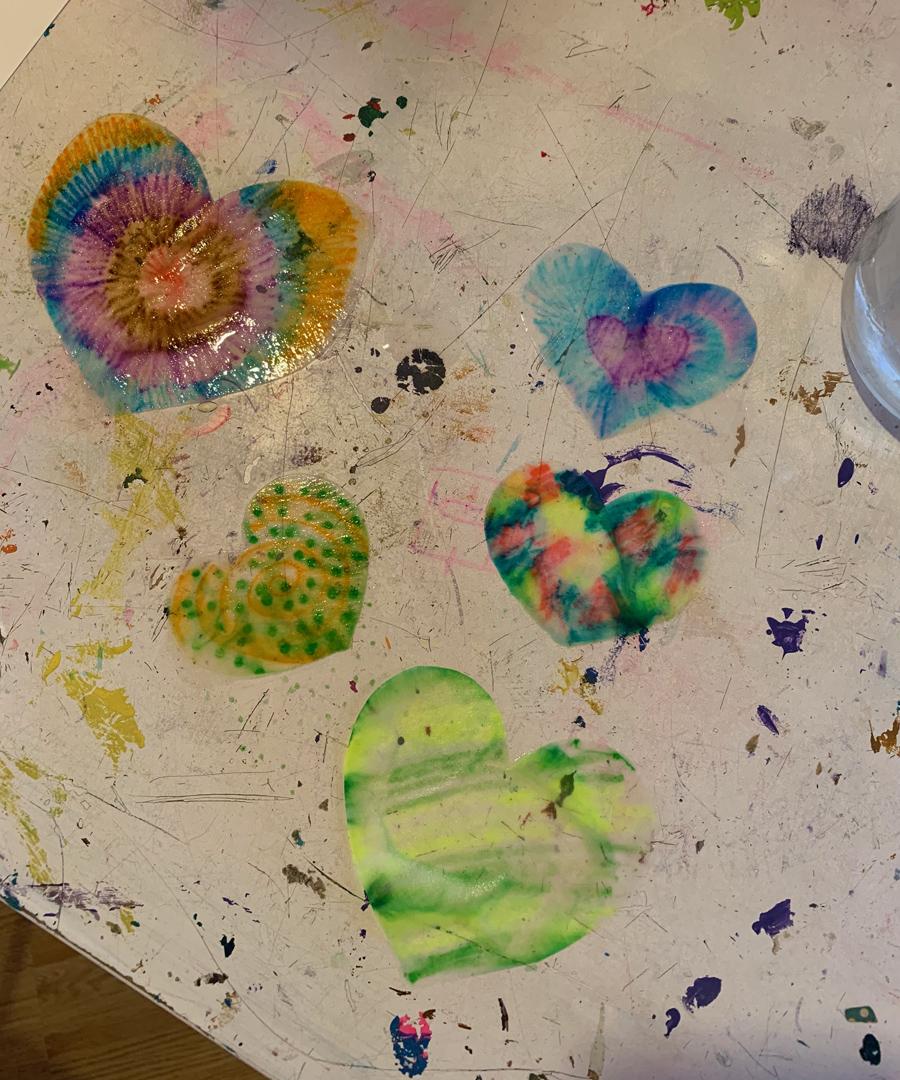
Oil pastel, tie-dye coffee filter heart flowers

Instructions for the coffee filters:

Materials:

  • Coffee Filters
  • Markers
  • Scissors
  • Water

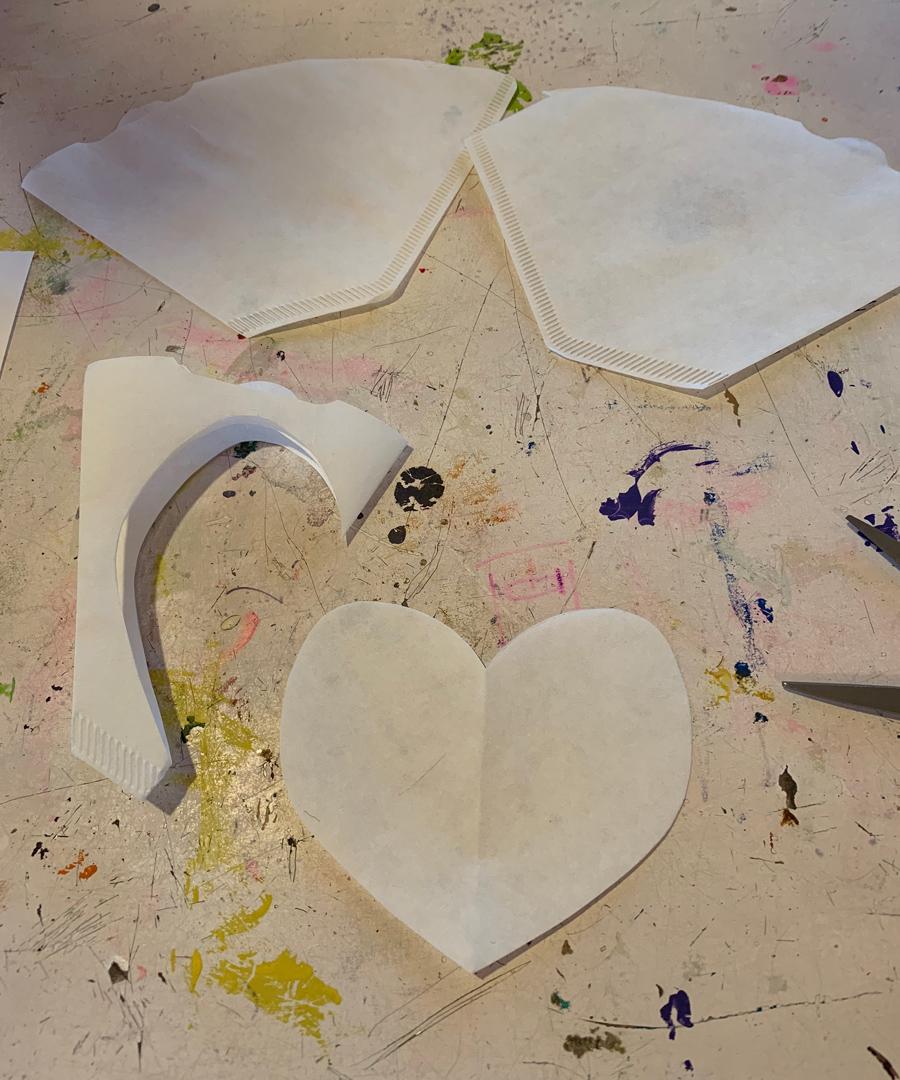
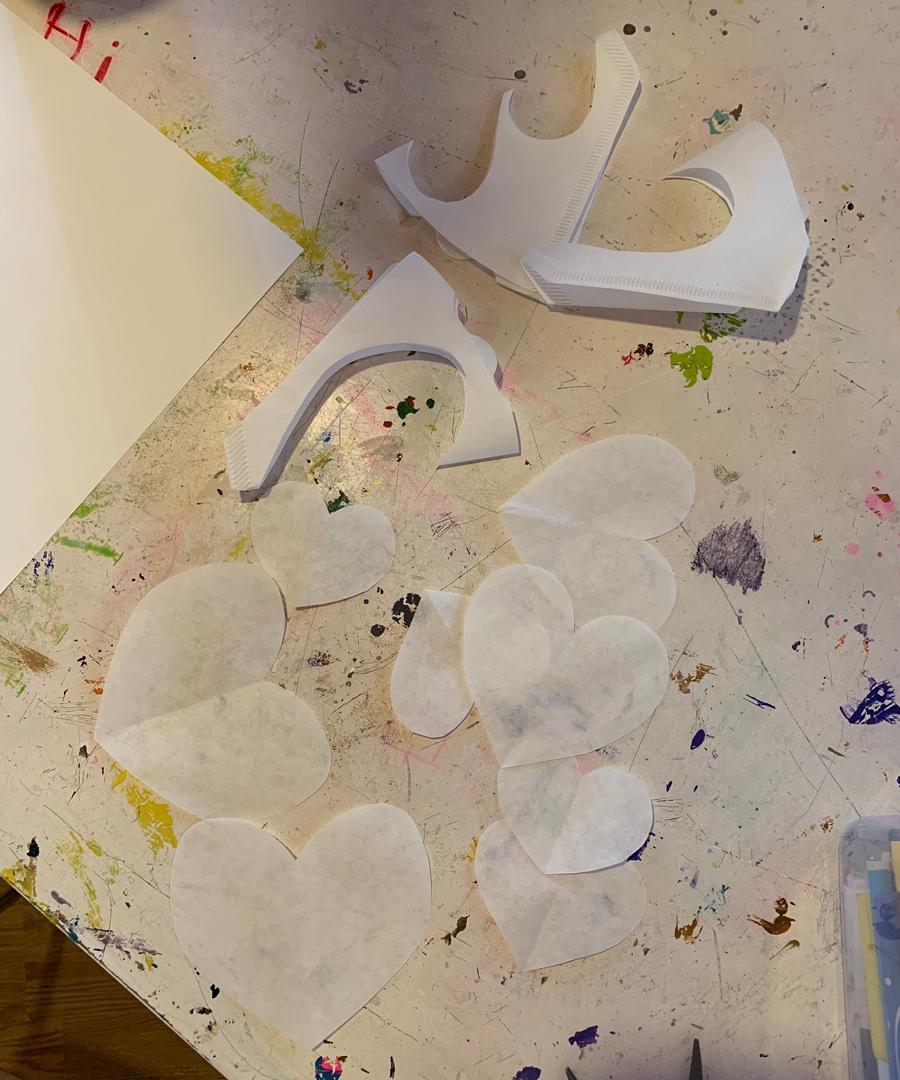
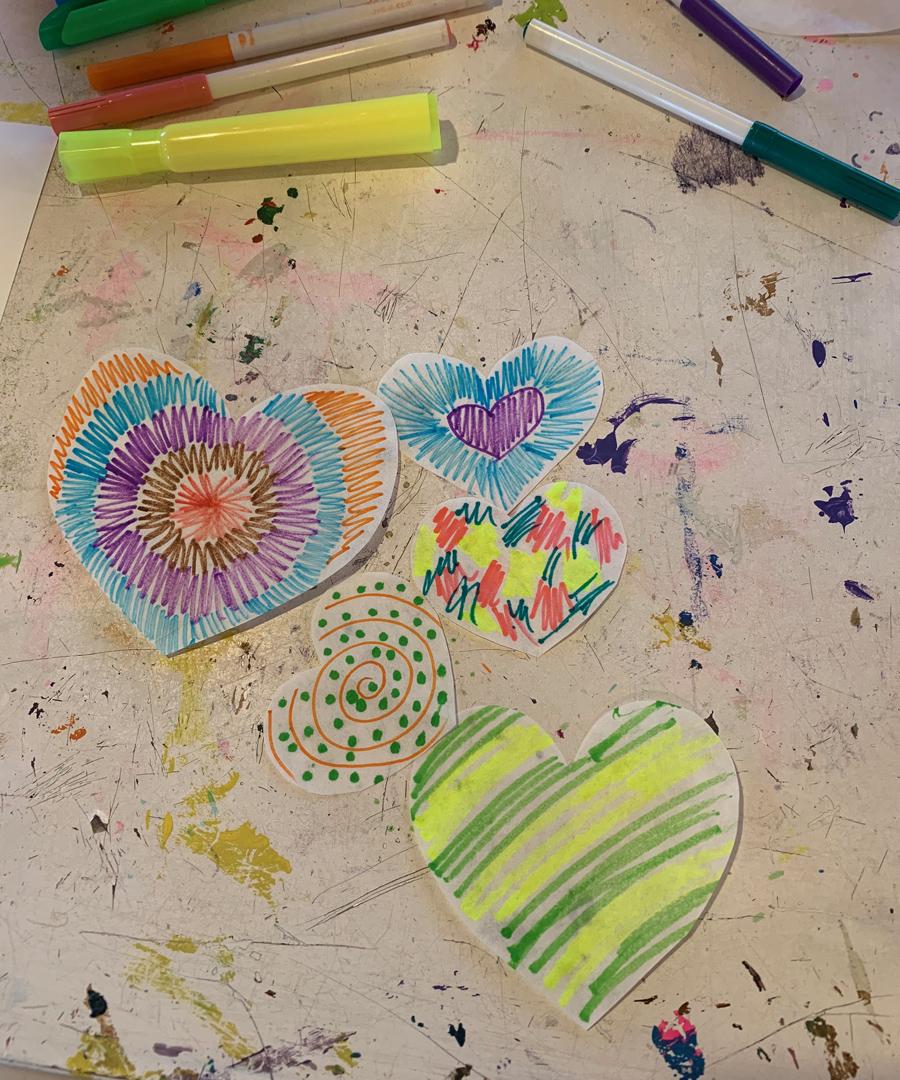
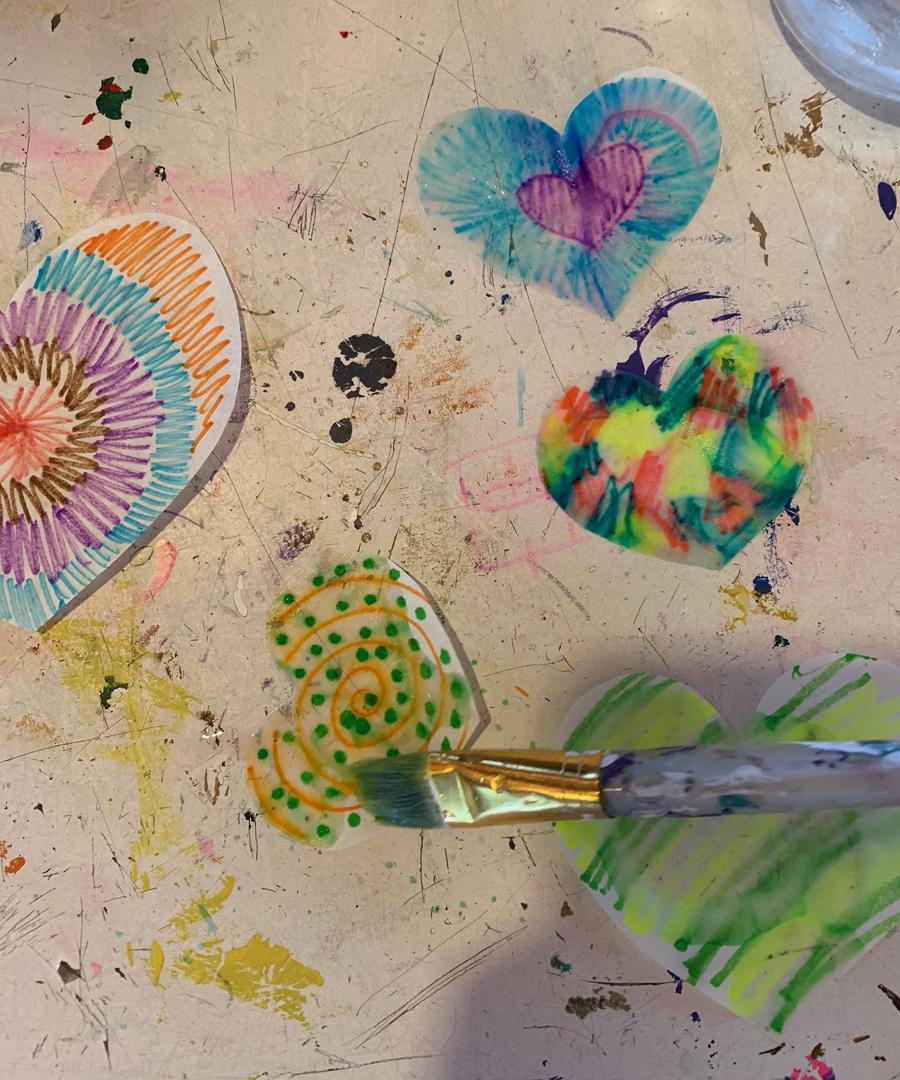
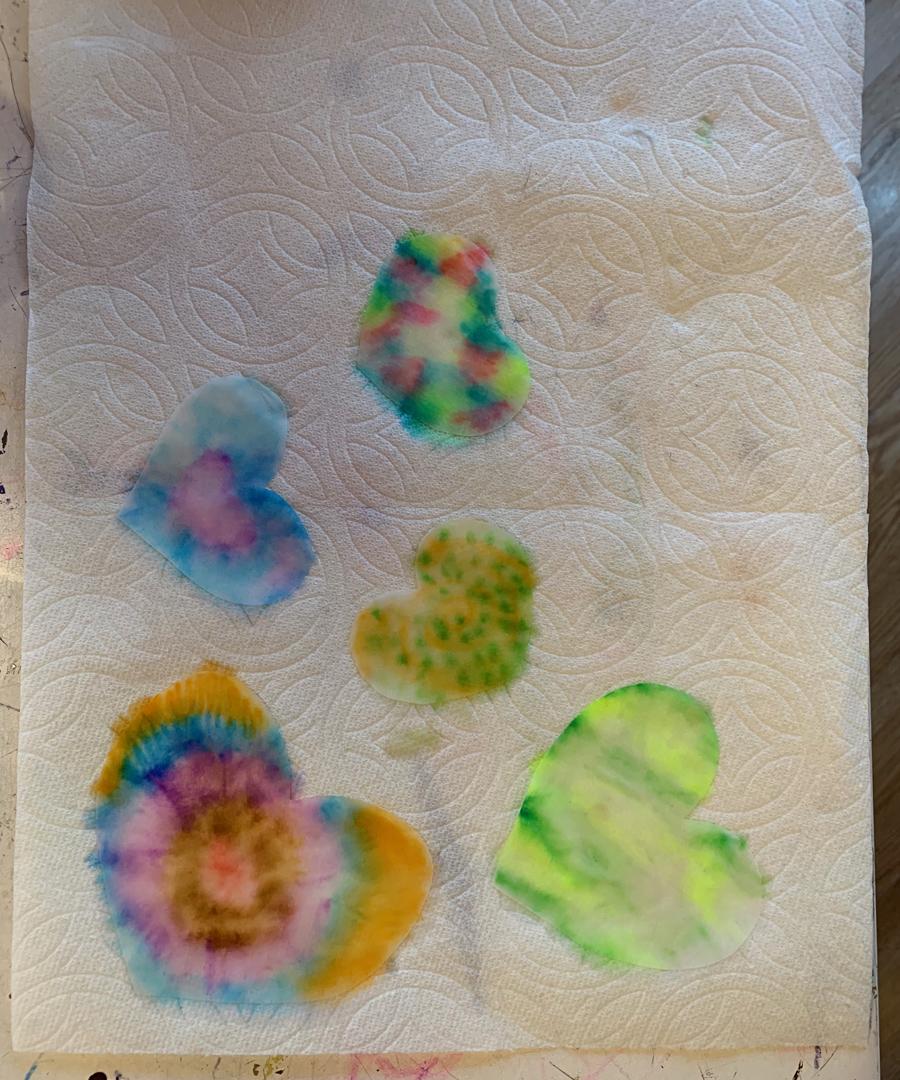
Making flowers from filters is super simple! First, cut out the shape you would like to work with from the filter in a few different sizes and then color them with markers.  Add multiple colors on each piece so that they will bleed into each other and give it a tie-dye effect. Try some with patterns and some random! You don’t need to be very precise, because the marker will bleed and cover the whole filter.  Once you’ve colored the filters, simply drop water on top of them and watch the marker bleed (you will definitely want to do this on a protected surface). Move them to a paper towel to dry.

Hope you guys enjoyed this lesson!  Make sure to share what you come up with.

Sew at home with me

Hi all! I am so sorry this has taken so long for me to get up!! Figuring out zoom and zooming all day is my new passion. I hope everyone is staying creative at home. No? Well, let’s do some doll sewing together. This project is good for girls, boys, parents.. whoever. You can adjust the pattern to make it your own.

Background of Doll Making Madness

We started construction on our house on March 9 and so when the stay-at-home order came in we decided to come to our house that has a roof in Mammoth. So, I am surrounded by natural beauty but so far from all of you and so far from all of my crafty tools.

Since so many of you are home without any crafty tools of your own, I wanted to create a hand sew project that you can make with just a needle, thread, a pattern(included below), some kind of fabric from your house and something to stuff the darn thing with.

The possibilities are endless..

SUPPLIES AVAILABLE!** If you need supplies for your doll-making and are not able to dig them up out of a drawer or get them at Vons'(that’s where I got some of mine!) then I am happy to have a member of my team create a bag for you. We have more than enough fabrics, needles and thread, embroidery floss, hot glue sticks, eyes, yarn.. you name it. If you’d like to swing by and pick up a bag curbside please let me know and we can put together something special for you!
OK! Without Further adieu, here is the lesson! 
PATTERN:I have included the pattern for our basic body doll and also our horse doll, as it is a big time favorite around these parts. If you want to add ears to the regular doll to make a cat, dog or what have you doll – you can do that after you sew up the doll. If you desire to add a unicorn horn or wings to your horse you can do that too! But, after you sew the body is the best time. PRINT THE PATTERN: make sure when you print this pattern, you select to have it fill a whole 8.5×11 page. that will give you the correct size. 

MAKE YOUR OWN: You don’t have to use mine. You can make your own (a la sourpatch kid or camelcorn above). If you are making your own just make sure you remember to leave at least a 1/4″ seam allowance around the outside. If you are making an adjustment using the basic pattern – perfect. Just fold it in half and trace it onto half of your paper. Then, make your adjustments. Hold that half up in front of a sunny window and trace the other side. I made an alien today for my zoom class and it was fab. More on that later.

IMG_9275.jpg
IMG_9276.jpg

Cut on the outside line – that is the seam allowance line. Why are the extremities(arms and legs) so big, you ask? Once we sew and turn inside out, we need the legs to be nice and big so we can turn them inside out and stuff them. 
SUPPLIES FOR LESSON

IMG_9289.jpg

I was able to find these things at Vons.. I ordered my supplies through Michaels.com but it has not arrived yet since I am in Mammoth. So, I had to get creative! Luckily, the supermarket has these items! I bought the cotton balls to stuff my doll in the meantime while I wait for my Michaels order! They also do curbside pick up. Again.. see above offer to create a bag of supplies for all of you!
FABRIC:I did not have any fabric present but was lucky enough to have a handful of old dish towels that I had brought up here! I was very excited to see this deer dish towel and that is what I will be using for mine. Super cute! You can use any woven fabric that you have around the house.. that is, fabric that doesn’t stretch. Some examples include old sheets, pants, shirts. Anything that doesn’t stretch. You know I am partial to anything that has a little print on it, too. That makes your doll so much more interesting!
STEPS1.) Cut out your pattern on the outside line. 2.) Lay out your fabric. Place your pattern on your fabric, trace and cut 2!**DO you lay the pattern in the middle of the fabric?? no! Make sure you put the pattern on the edge of the fabric so you can use as little as possible. check out my cute deer..

IMG_9282.jpg

3.) Once you cut these out, put the two shapes together with the *RIGHT* sides together. The ‘right’ side of the fabric is the printed side or the side that is meant to be facing out. If we put the right side of the fabric together, once we sew and turn right side out, the right side will be facing out. 
4.) STITCH TIMEok – it’s stitch time! See the pen marks below that resemble the type of stitch we are using. It’s the blanket stitch, which we all already know from class. With your thread you enter from one side, go through both layers then over the top and enter again from the initial side. You are always starting from the same side. *Make sure to keep your stitches small and close together so that once we turn it inside out, no fluff comes through. 

IMG_9290.jpg

** Threading your needle – remember, you can start your stitches without tying a knot. Most of you I have taught this too.. but we still have a few stragglers. Simply put a big piece of thread on a needle and pull through until the thread is even on both sides. Then, pull the thread through both layers until the tail of the thread has only 1″ left. Go around with your needle and make the first stitch, but don’t pull so hard as to pull the tail of the thread through. You will make a loop with your thread. Simply put your needle through the loop like you are tying your shoes. Repeat this step 2x and you will have a secure double thread to start your sewing with. I made a fab video of this and I will figure out how to get it to you!I will send a separate instruction with photos right now of threading process. 
5.) Stitch all around outside of doll. Leave a 1.5″ hole. The best place on the regular doll to leave the hole is the head. The best place on the horse is on his butt! Eventually, you will cover those spots with hair and a tail so any wonkiness won’t matter. 
6.) Make sure you tie off the end of your thread the same way you started!You cannot just cut the thread when you are done, the thread will unravel. Make sure to use an old fashioned knot or to do the loopy thing we started with. 
7.) When you are done sewing, you can turn inside out and stuff! If you are stuffing with puff balls, like my rag doll, Ava has taught me that the best way is to unroll the balls before stuffing…

ooh.. ahhh


This is enough of a task for all of our young sewists for this week!This is the base of our new creation. I cannot wait to see where you take it in coming weeks!!

Here is my sweet rag doll that I have so far… decorating will come later this week!! Just so you know.. babies love this.

So get your needle and thread out and get your doll on! It would make my life right now to see random doll pics floating in!

If anyone is still reading.. I have a totally awesome hand sew class coming this friday! We will be taking our stuffy menu, making it mini and handsewing in a fabulous sewing circle over zoom. Get in on it! All supplies provided. Email me at jaimee@paintboxartstudio with questions.

Love to you all!!

Machine Sewing from Home

Hi All.. this is Jaimee. This is the first blog post of many for our sewists who have a machine at home and need some fun ideas to work on. Our newest sewing teacher Mrs. Deanna hooked us up with this super sweet project and video!

I have a feeling you guys have some extra time on your hands. Plus, this shelter-at-home time is good for one special thing: bonding with family! So, we give you this fun interactive memory game project to work on. It’s your typical memory game, but using different scraps of fabric you have at home instead of paper. Plus, you can take it to the next level by using clear vinyl to make little pockets in which you can place a drawing, a leaf, flower petal, whatever!

If you need us to help hook up some supplies for you, please just shoot us an email at jaimee@paintboxartstudio.com. We will gladly leave some supplies curbside for you. Lord knows we have enough scraps.

Supply:

* Scrap fabric for the background of memory ‘cards’, enough for 2 sides each x as many cards as you want. (at least 30/15 matches I think!)

* Smaller pieces of scraps of whatever you have laying around the house for your ‘images’ on your matching cards

*Scissors, pins, sewing machine, ruler, paper to make a pattern.

*Bonus material: vinyl from a container around the house or old shower curtain. You can even use the thick plastic from one of the bigger, thicker zip lock baggies.

HOW TO: Watch Video!!

HOW cute is this game?
Bonus points for adding clear vinyl pockets to your game..
Fill the vinyl sleeves with pictures or cool elements from nature.

We want to see some pics and video of your games that you make at home!

Tag us on istagram @paintboxartstudio or shoot us an email at jaimee@paintboxartstudio.com

Look out in the upcoming week for a series of art, sewing and hand sewing classes that are going live via zoom!