Cardboard Loom Weaving
Hi everyone! It’s me, Amy. Trying to stay busy by making things in my home all day long and excited to share a ‘how to’ on this cardboard loom weaving I made! Not only is it awesome, but the actual weaving is quite relaxing and satisfying, I find. Hope you all enjoy!


Materials:
- Cardboard
- Yarn
- Tape
- Scissors
- Yarn Needle (Optional)
Step 1 – Make Your Loom
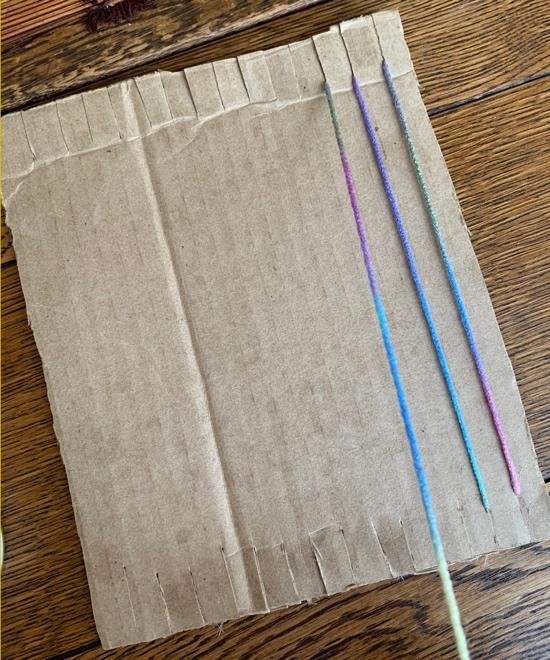
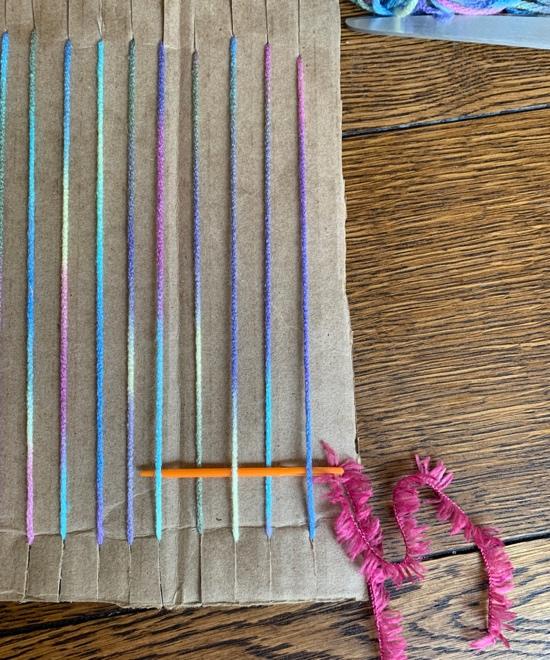
Grab an old box and cut a piece of cardboard to a size and shape that you would like your weaving to be. Cut slits in each end of the cardboard like so:

Then, starting on a far side of the loom, tape down a piece of yarn to start winding into the slits. After you have wound the yarn through the entire piece of cardboard, tape down the other end of the yarn, and you’ll be good to go!


Step 2 – Starting Your Weaving
Choose a yarn you would like to start with, and if you have a yarn needle, thread the end of the yarn through the needle and weave through your first line by going under, over, under, over, and so on. Leave a small amount of yarn hanging off the edge. We will take care of that later. When you turn back the other direction, make sure you are going under and over the opposite pieces that you were the time before.

Lightly pull your weaving down as you go so that the yarn stays close together.

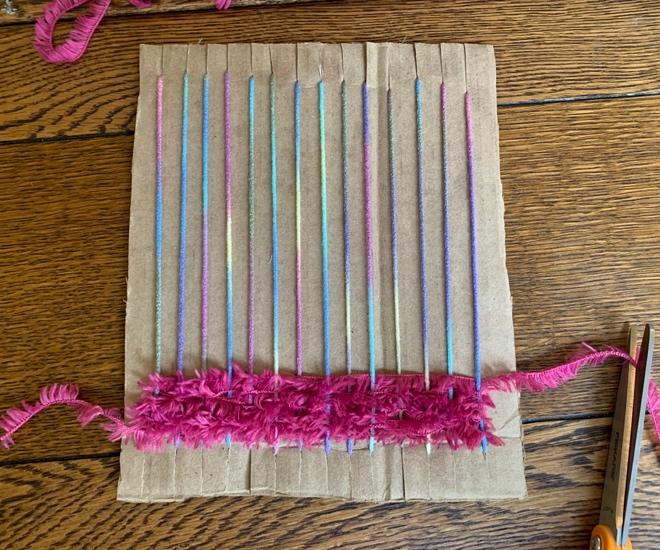
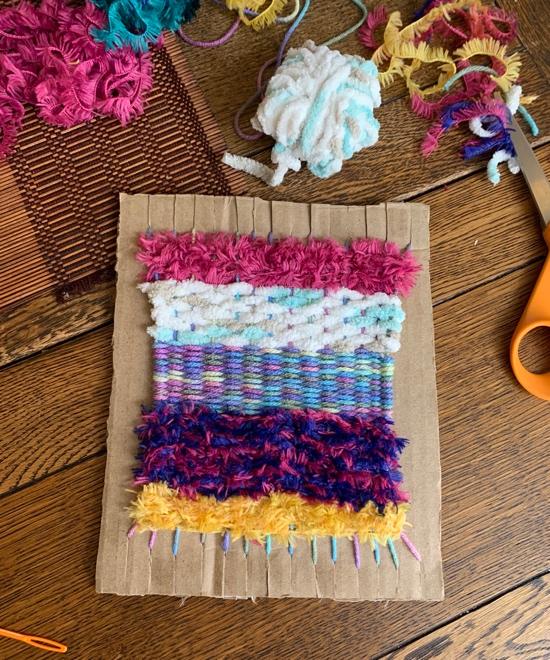
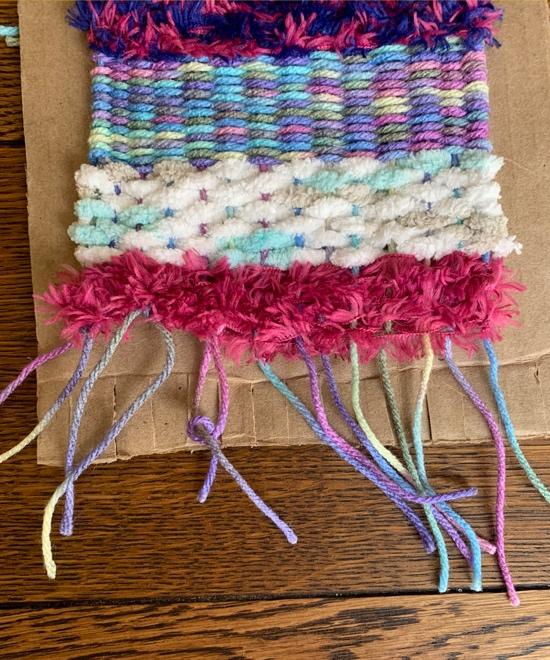
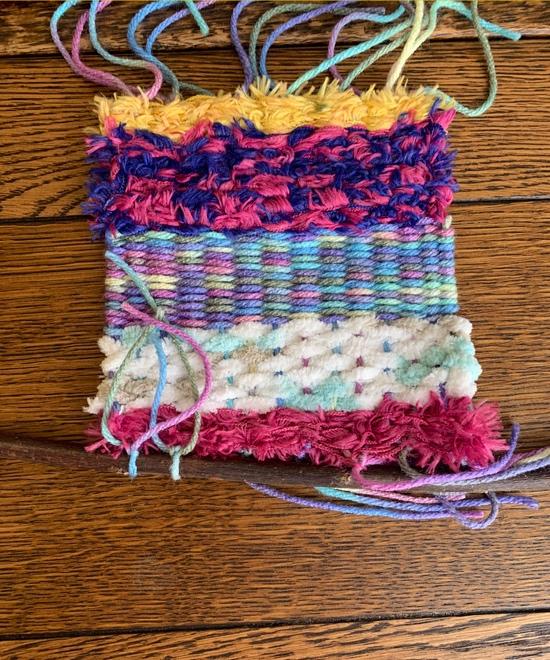
When you finish your first color, trim off the end of the yarn leaving just a bit hanging off the edge of the loom. Again, we will take care of this later. Begin with your next color the same way. You will see in the pictures coming that I used two furry yarns together at one point to mix some colors together. (This mainly worked because of the texture of the yarn).


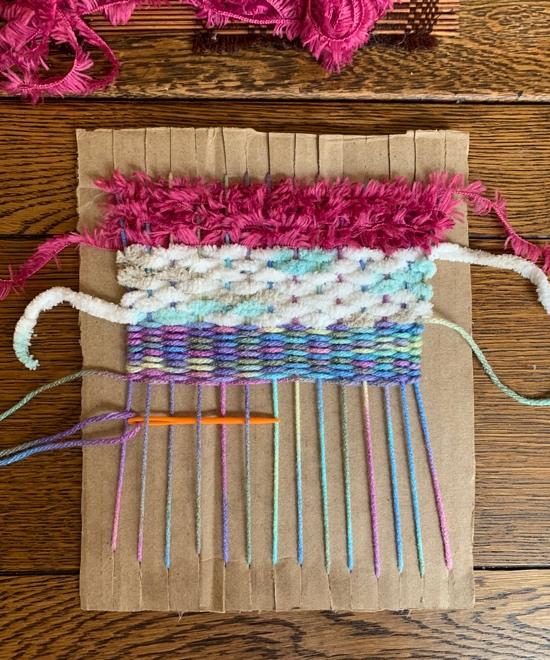
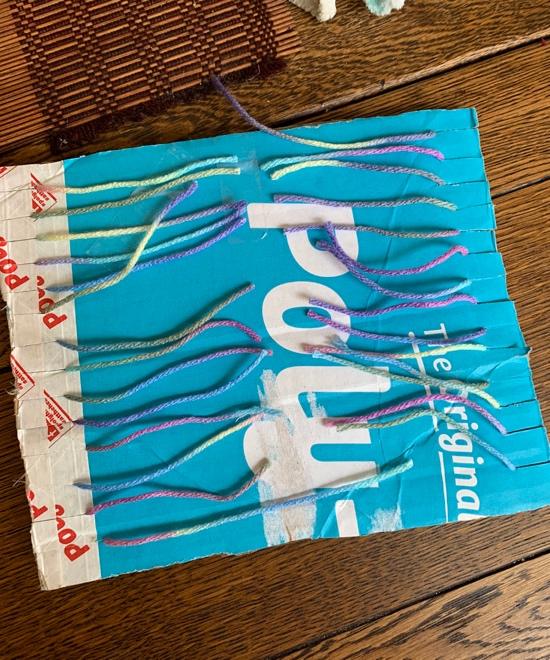
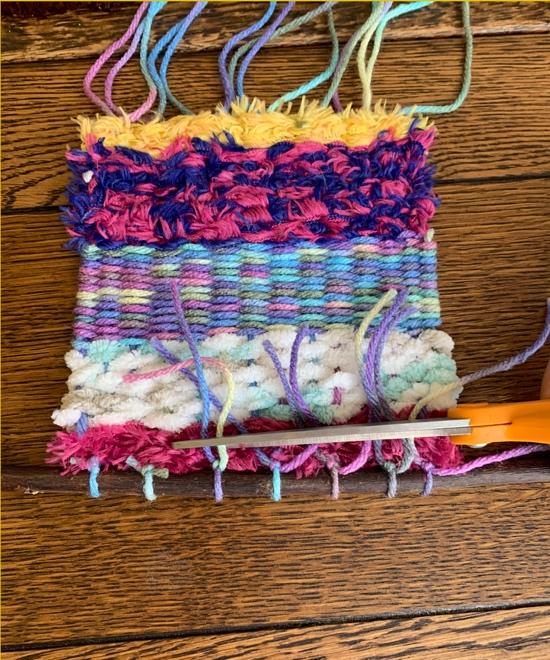
Step 3 – Cleaning the Edges
This is where a needle is useful, but if you don’t have one, you can simply tie the edge of the yarn in a tight knot around the outer loom yarn. If you are using a needle, simply thread the edge of the yarn, and pull it through the outer loops of your weaving. It’s best to pull it through the section of it’s own color to hide it best. Once it’s through, just cut and trim the rest!


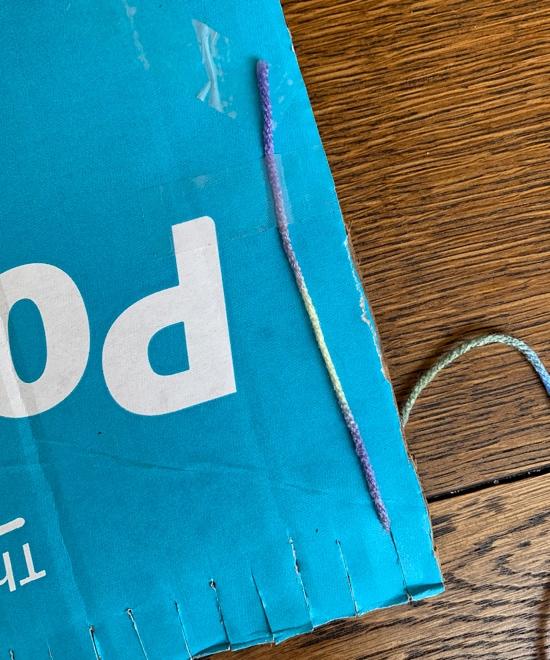
Step 4 – Removing the Weaving
Turn your loom over, and cut through the center of the yarn on the back. Then, start by pulling off just one end of the loom.

Take the yarn pieces two by two, and double knot them together. This will keep the bottom of the weaving in place. Then, do the same to the other side of your weaving.


Voila! Your weaving is now fully secure and removed from the loom!
Step 5 – Finishing Touches
Now, this part is really up to you! Depending on what you want to do with your weaving, you can either trim the edges of the loom yarn to make them even if you are making, say, coasters or a miniature rug for a pet or something that will be sitting on a surface. I’ve decided to attach mine to a found branch so that I can hang it on my wall.
I flipped my loom over, chose which side I wanted to be the top, and laid the branch across it. I used my loom yarn, again two by two, and knotted it around the branch so that the knots would be hidden in the back. Then, I trimmed the excess.
For the bottom of the loom, I decided to add in some more of the yarn I used to create the loom so that it would look much more full. I simply tied pieces of the yarn through the bottom of the weaving and in between each knotted piece that was already there. Then, I cut all the hanging yarn so that it was even across. This could be a fun place to experiment with different length fringe at the ends, or even add in some hanging beads!


Lastly, I tied a piece of yarn to each end of the branch so I could hang it on a wall! How adorable, right?

Make sure to share what you guys come up with! ☺